Mouth-watering Easy Homemade Pizza Recipe
Welcome to my easy no-knead challah bread recipe! As a chef, I have always found kneading bread dough to be a time-consuming and tedious task. That’s why I have created this recipe that requires no kneading at all!
Challah bread is a traditional Jewish bread that is often served on the Sabbath and other holidays. It is a sweet, rich bread that is perfect for French toast or as a side to any meal.
I have simplified the process of making challah bread so that even beginner bakers can make this delicious bread with ease. With just a few simple ingredients and steps, you can have fresh, homemade challah bread in no time!
I guarantee that this easy no-knead challah bread recipe will become a staple in your cooking repertoire. So, let’s get started!
Why You’ll Love This Recipe

Are you intimidated by the thought of making bread from scratch? Do you think that kneading the dough is a tedious and time-consuming process? Well, I have great news for you! This Easy No-Knead Challah Bread Recipe is perfect for you!
With this recipe, you don’t need any special equipment or expertise to make delicious and fresh bread in the comfort of your own home. The dough comes together quickly and only requires one bowl, a wooden spoon, and a few simple ingredients.
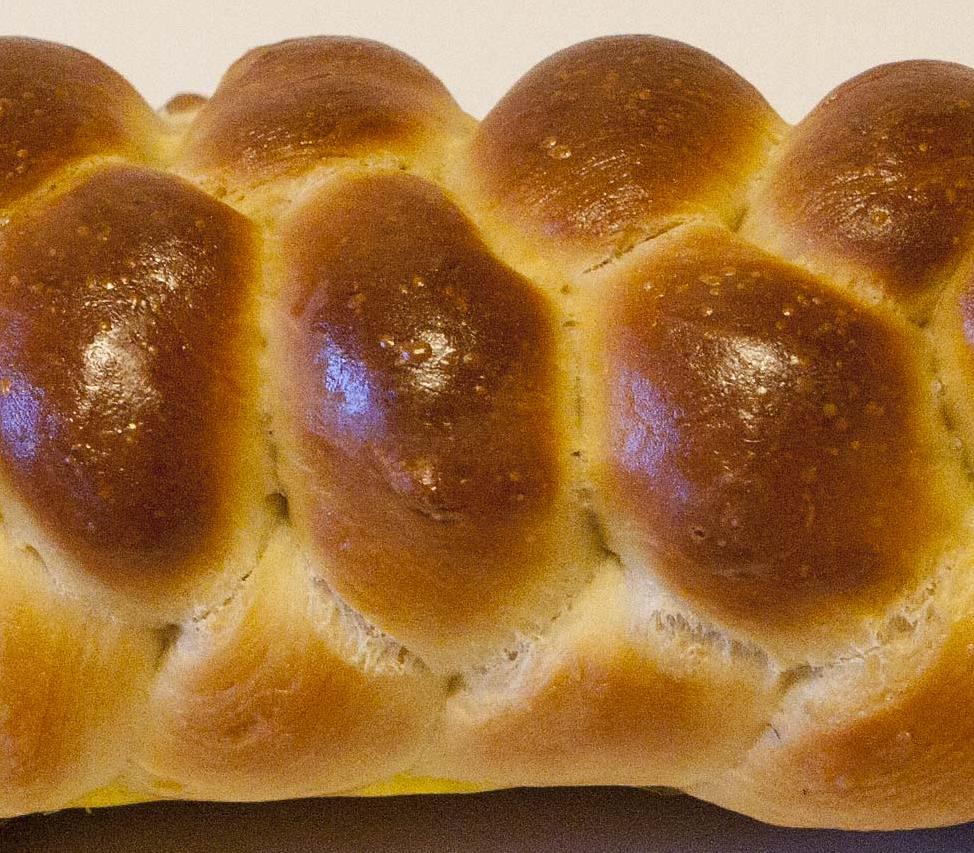
But what makes this recipe truly special is the taste of the bread. The combination of honey, unsalted butter, and eggs gives the challah a subtle sweetness that pairs perfectly with the nutty flavor of sesame and poppy seeds. The bread is soft, fluffy, and has a beautiful golden crust that will make you feel like a professional baker.
This recipe is perfect for those who want to impress their guests with freshly baked artisan bread. It’s also an excellent option for those who follow a gluten-free diet, as it can easily be adapted by using gluten-free flour and instant yeast.
So why will you love this recipe? Because it’s an easy and foolproof way to make delicious bread at home, without any of the hassle of traditional bread-making methods. It’s perfect for beginners and seasoned bakers alike, and it will make your kitchen smell like a bakery. Trust me, once you try this Easy No-Knead Challah Bread Recipe, you’ll never go back to store-bought bread again!
Ingredient List
Before we start making our Easy No-Knead Challah Bread Recipe, let’s check out the ingredient list. You will need the following:
Ingredients:
- 4 cups unbleached all-purpose flour (you can use King Arthur brand)
- 2 tsp instant yeast (like SAF)
- 1/2 cup honey
- 2 tsp salt
- 2 large eggs plus 1 egg yolk (at room temperature)
- 1/4 cup unsalted butter, melted
- 1/2 cup warm water (105 to 115 degrees Fahrenheit)
- 1/2 cup warm water (95 to 105 degrees Fahrenheit)
- 1 tbsp poppy seeds (optional)
- 1 tbsp sesame seeds (optional)
Make sure to measure the flour correctly, as it can affect the texture of the bread. You can also add poppy or sesame seeds to the dough or sprinkle them on top of the bread for extra flavor and texture.
The Recipe How-To
Now that we have gathered all the ingredients, let’s get started with making the Easy No-Knead Challah Bread Recipe.
Mixing the Dough
-
In a large bowl, combine 4 cups of unbleached all-purpose flour, 2 tsp of instant yeast, and 1 tablespoon of salt. Mix well.
-
In a separate bowl, whisk together 2 eggs, 1 egg yolk, 1/2 cup of honey, 1/2 cup of unsalted butter, and 2 cups of lukewarm water.
-
Pour the wet ingredients into the dry ingredients and mix well with a wooden spoon until the dough comes together.
-
Cover the bowl with plastic wrap and let the dough rise for at least 1 1/2 hours or until it has doubled in size.
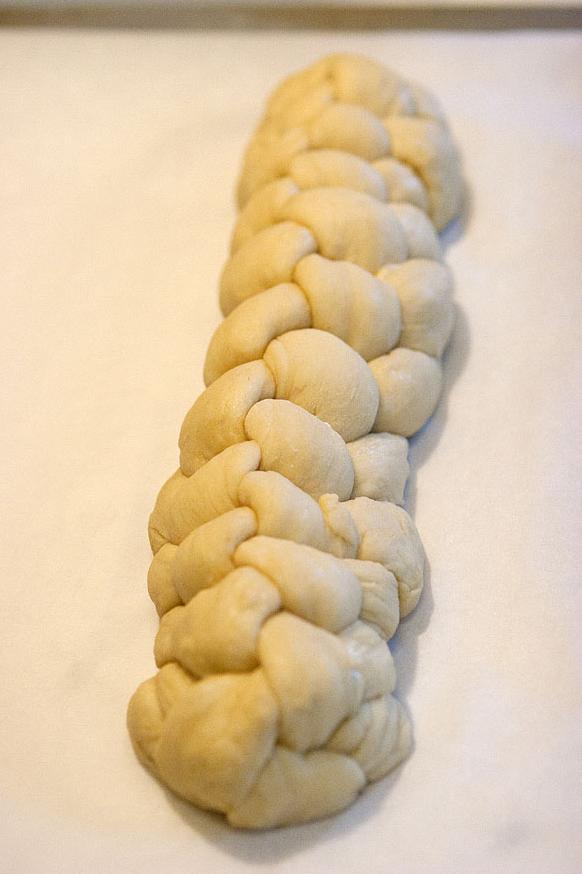
Shaping the Challah
-
After the dough has risen, sprinkle some flour on a clean surface and transfer the dough onto the surface.
-
Divide the dough into 3 equal parts and roll each part into a long strand.
-
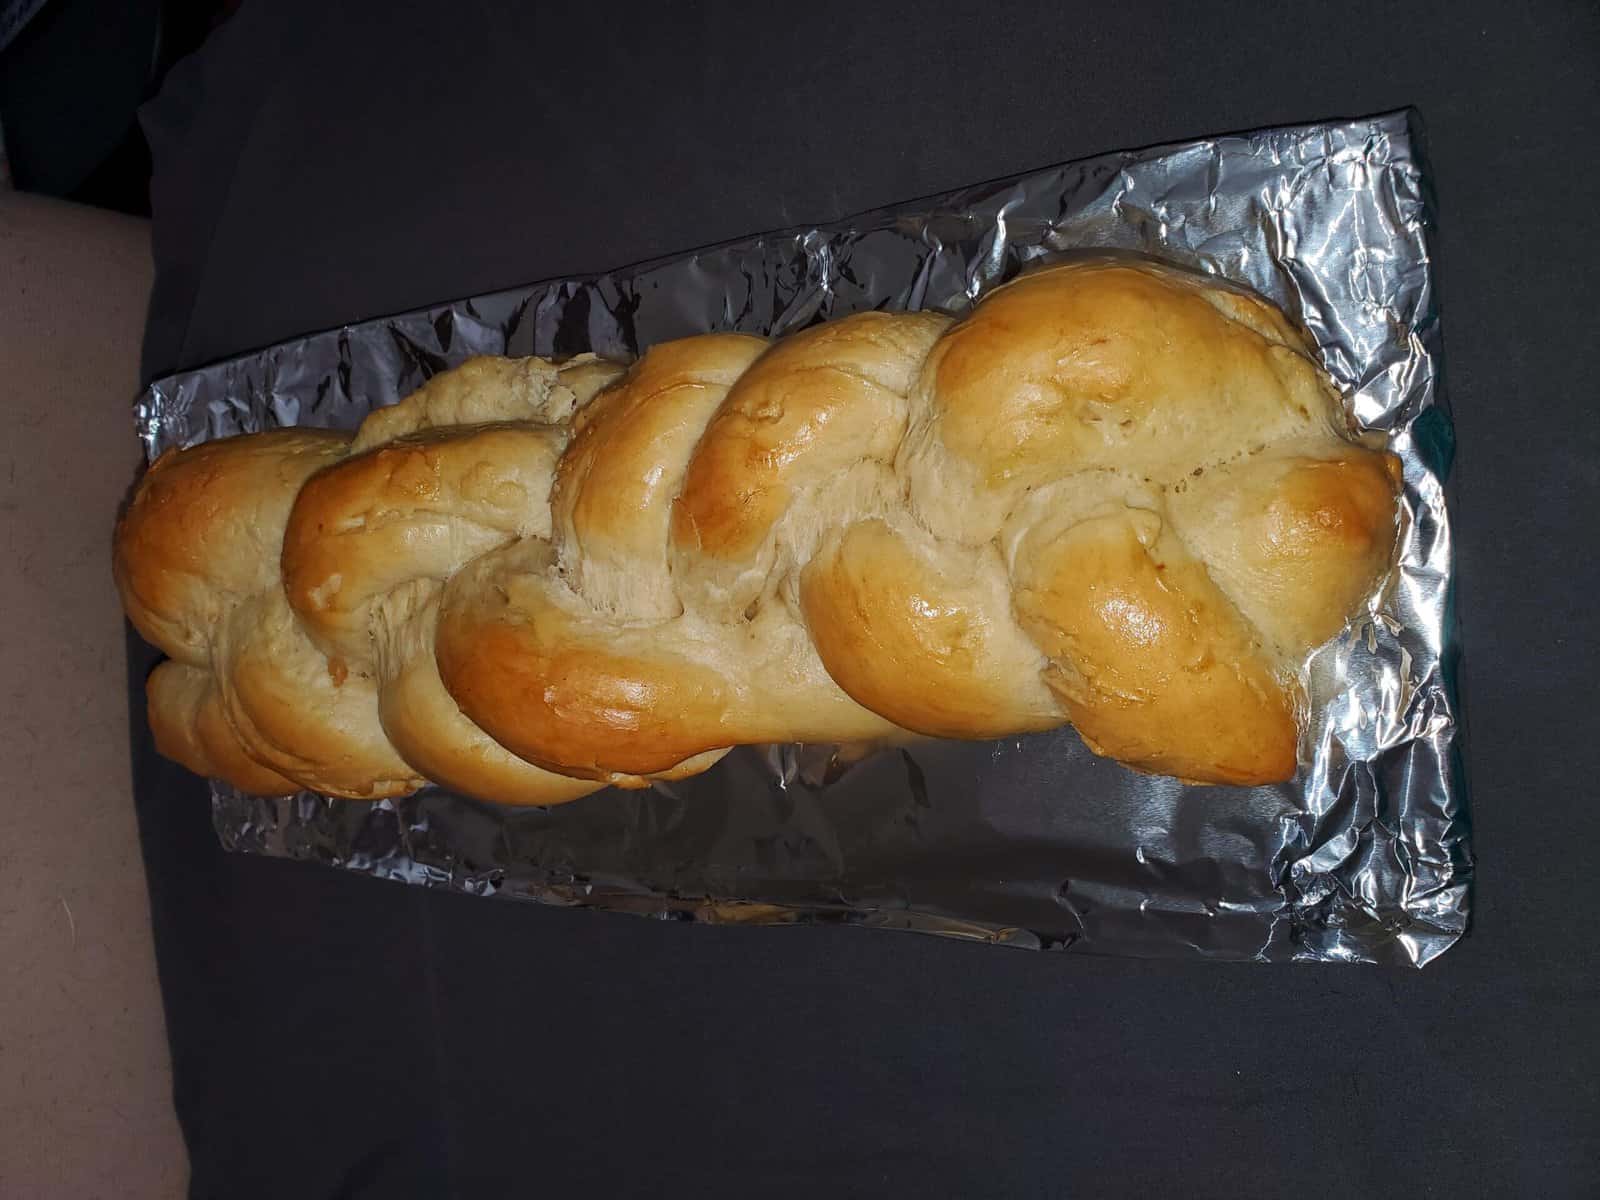
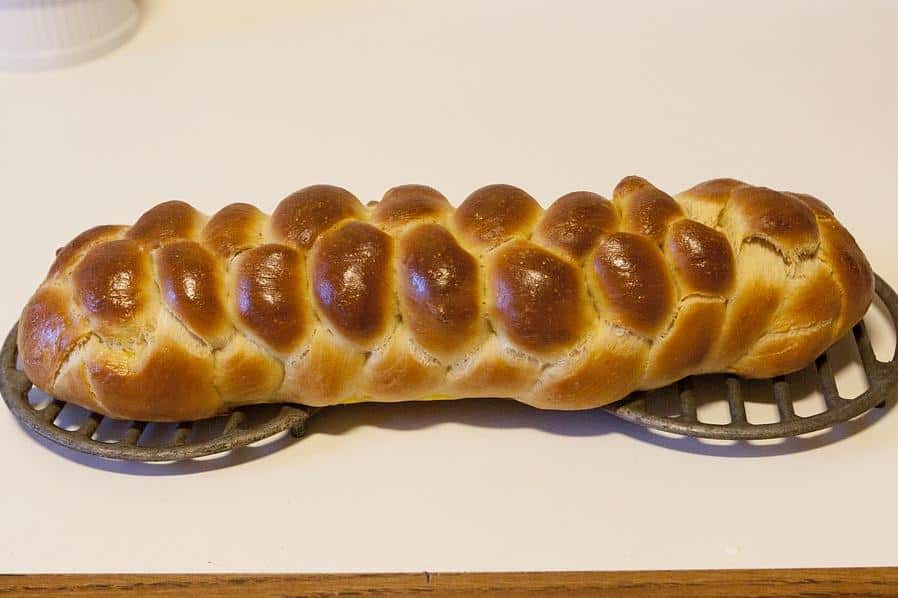
Braid the strands together to form a loaf of bread.
-
Transfer the loaf onto a baking sheet lined with parchment paper.
-
Cover the loaf with a clean towel and let it rise again for about 30 minutes.
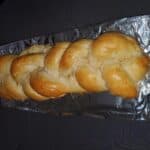
Baking the Challah
-
Preheat the oven to 375°F.
-
In a small bowl, whisk together 1 egg yolk and 1 tablespoon of water. Brush the egg wash over the challah.
-
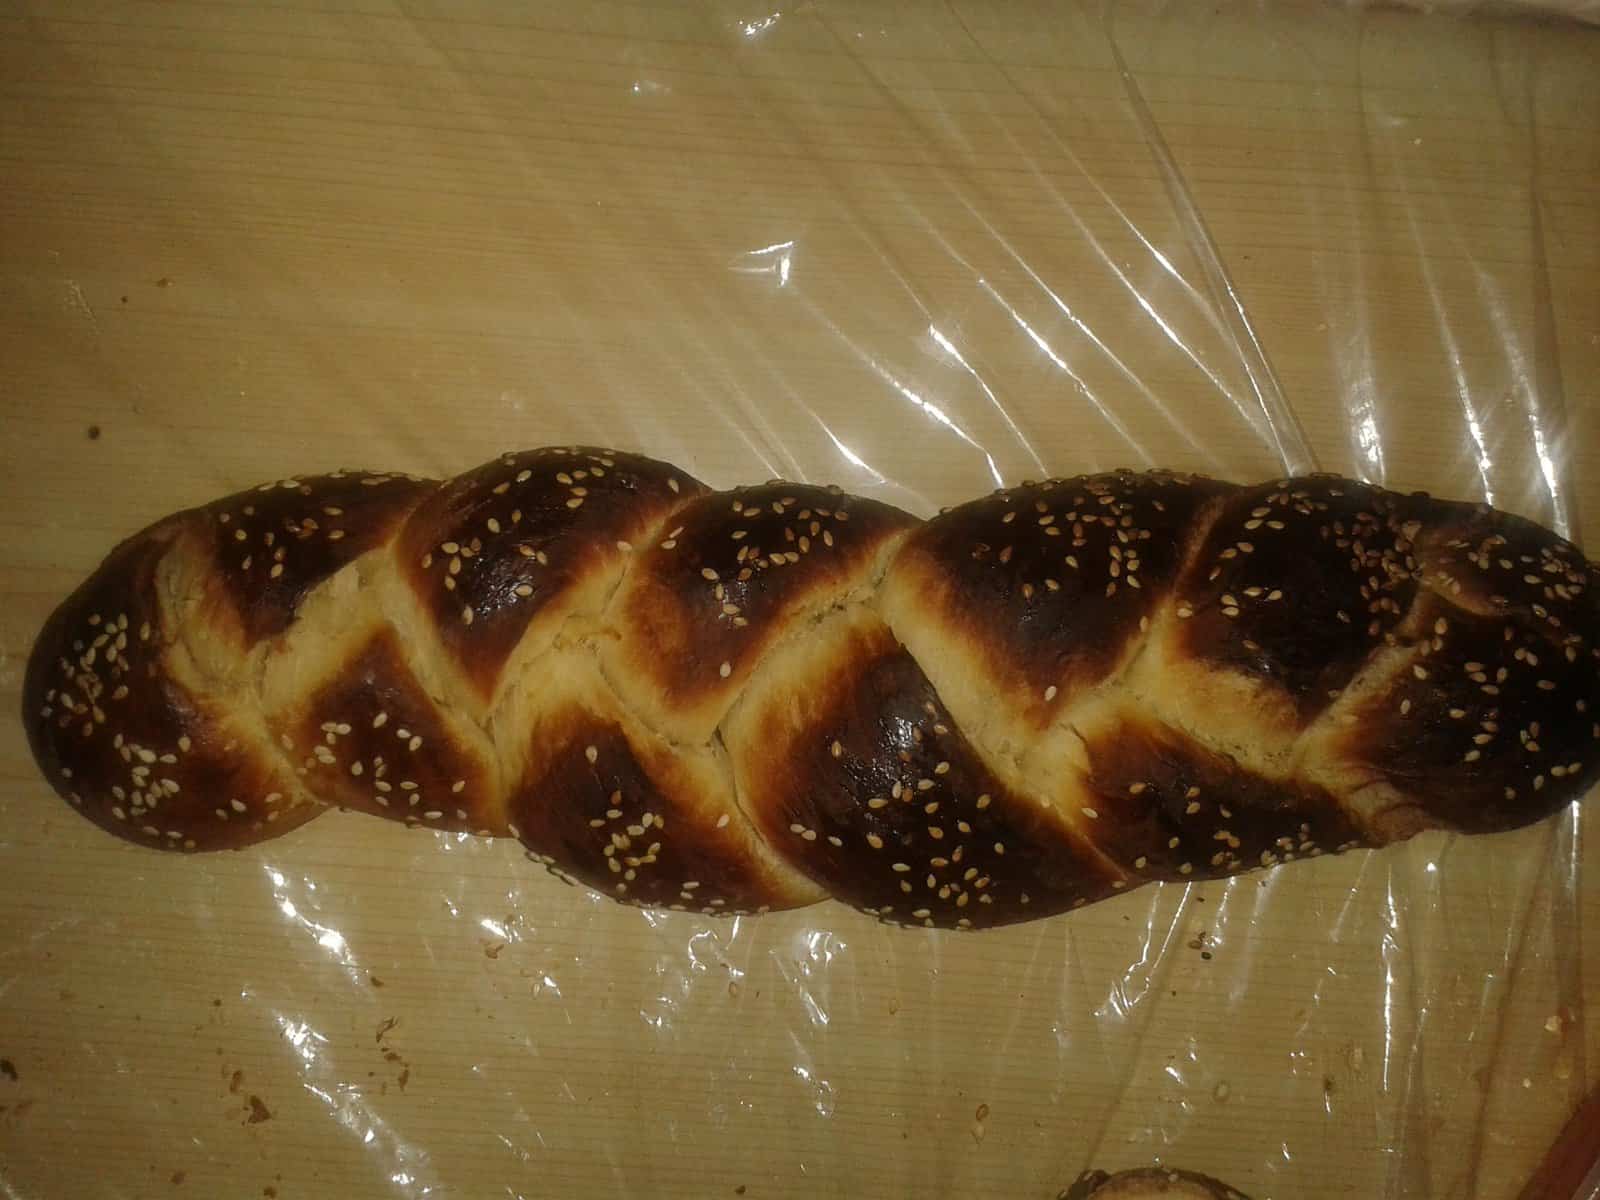
Sprinkle some poppy seeds or sesame seeds over the top of the challah.
-
Bake the challah for about 30-35 minutes or until it is golden brown.
-
Remove the challah from the oven and let it cool on a wire rack for at least 10 minutes before serving.
Enjoy your freshly baked Challah Bread!
Substitutions and Variations
One of the best things about this easy no-knead challah bread recipe is that it lends itself to a variety of substitutions and variations. Here are a few ideas to make this recipe your own:
– Flour: While the recipe calls for unbleached all-purpose flour, you can experiment with using different types of flour. For example, you could try using bread flour for a chewier texture or whole wheat flour for a heartier flavor.
– Sweeteners: The recipe calls for honey, but you could easily swap it out for other sweeteners like maple syrup or agave nectar. You could also try using brown sugar or coconut sugar for a different flavor profile.
– Toppings: The classic toppings for challah bread are poppy seeds or sesame seeds, but you could also try other toppings like flax seeds, sunflower seeds, or even everything bagel seasoning.
– Shape: While the recipe calls for a traditional braided challah shape, you could experiment with different shapes like a round or oval loaf, or even rolls.
– Gluten-free: If you need to make this recipe gluten-free, you can try using a 1-to-1 gluten-free flour blend in place of the all-purpose flour. Just be aware that the texture may be slightly different.
By playing around with different substitutions and variations, you can make this easy no-knead challah bread recipe your own and create a delicious artisan bread that is uniquely yours.
Serving and Pairing
This easy, no-knead challah bread recipe is perfect for any occasion. Whether you’re serving up a savory meal or hosting a brunch with friends, this sweet and fluffy bread is sure to impress. The golden crust is lightly sweetened with honey, while the inside remains soft and chewy.
Serve it up warm with a smear of butter, honey or jam for a simple, yet satisfying breakfast. Or, use it as the perfect vehicle for sandwiches and toast. The possibilities are endless!
For a more indulgent breakfast, try pairing this challah bread with a classic egg dish, like eggs benedict or scrambled eggs. The sweetness of the bread will complement the savory flavors of the eggs and create a delightful balance.
If you’re serving this bread with dinner, it pairs well with a variety of dishes. The sweet notes of the bread complement savory dishes like roasted chicken, stews and soups. You can even use it to make delicious French toast or bread pudding for a decadent dessert.
No matter how you choose to serve it, this easy no-knead challah bread recipe is sure to impress your guests and leave them coming back for more.
Make-Ahead, Storing and Reheating
One of the best things about this easy no-knead challah bread recipe is that you can make it ahead of time and store it for later. You can even freeze the dough for up to a month before baking it, making it the perfect recipe for busy schedules.
To make the dough ahead of time, complete the recipe up until the point where you let the dough rise for the first time. Instead of baking it immediately, cover the dough with plastic wrap and place it in the refrigerator for up to 24 hours. When you’re ready to bake, take the dough out of the refrigerator and let it come to room temperature for about 30 minutes. Then, shape the dough and let it rise for the second time before baking.
If you have leftover bread, you can store it in an airtight container at room temperature for up to 3 days. You can also freeze the bread for up to 2 months, but make sure to slice it before freezing to make it easier to reheat.
To reheat the bread, preheat your oven to 350°F and place the sliced bread on a baking sheet. Brush the slices with a little bit of melted butter and bake for 10-15 minutes, or until the bread is warm and toasted. If you’re in a hurry, you can also reheat the bread in the microwave for 15-20 seconds.
Whether you’re making this bread ahead of time or reheating leftovers, you’ll love how fresh and delicious it tastes. This easy no-knead challah bread recipe is perfect for any occasion, from family dinners to holiday celebrations.
Tips for Perfect Results
Baking bread is a precise science, and even the slightest mistake can ruin the entire recipe. However, don’t let that discourage you from trying out this easy no-knead challah bread recipe. Here are some tips to ensure you get perfect results every time:
1. Use high-quality ingredients: The quality of the ingredients you use can make a huge difference in the flavor and texture of the bread. Use unbleached all-purpose flour, fresh eggs, and unsalted butter for best results.
2. Measure accurately: Use a kitchen scale to measure all the ingredients accurately. Even a slight variation in the amount of flour or water can affect the texture of the bread.
3. Use instant yeast: This recipe calls for instant yeast, which doesn’t require proofing. It’s also more forgiving than active dry yeast and produces consistent results.
4. Don’t overmix the dough: Mix the ingredients until just combined. Overmixing can lead to tough bread.
5. Let the dough rise properly: The dough needs to rise twice before baking, and each rise should be at least an hour. Make sure the dough is covered with a damp cloth or plastic wrap to prevent it from drying out.
6. Brush with egg wash: Before baking, brush the bread with egg wash to give it a shiny, golden crust. You can also sprinkle poppy or sesame seeds on top for added flavor and texture.
7. Use a thermometer: To ensure the bread is fully cooked, use a thermometer to check the internal temperature. It should be around 190°F.
8. Let it cool: Resist the temptation to slice into the bread while it’s still hot. Let it cool for at least 30 minutes before slicing to allow the crumb to set.
By following these tips, you can make the perfect no-knead challah bread every time. Don’t be afraid to experiment with different variations and toppings to make it your own. Happy baking!
Bottom Line
In conclusion, this easy no-knead challah bread recipe is the perfect addition to any home cook’s repertoire. With its deliciously soft texture and sweet flavor, this bread is sure to impress your family and friends. Using just a few simple ingredients and a little bit of patience, you can create a beautiful and tasty loaf of bread that will rival any artisan bakery. Plus, with the ability to make substitutions and variations, this recipe can be customized to suit your personal preferences. So, whether you’re an experienced baker or a novice cook, give this easy challah bread recipe a try and enjoy the satisfaction of making fresh bread in your own kitchen.
Easy No-Knead Challah Bread Recipe
A fabulously easy recipe from "Artisan Bread in Five Minutes a Day" by Jeff Hertzberg and Zoe Francois that bakes a beautiful golden laof. This recipe takes very little effort (you basically need to mix ingredients in a bowl for a minute), but you do need to give the dough time to rise.
Makes four 1-pound loaves. The recipe is easily doubled or halved. You can freeze or refrigerate unused dough.
- 1 3/4 cups lukewarm water
- 1 1/2 tablespoons granulated yeast (2 packets)
- 1 1/2 tablespoons salt
- 4 large eggs, lightly beaten
- 1/2 cup honey
- 1/2 cup neutral-tasting vegetable oil (such as canola) or 1/2 cup unsalted butter, melted, plus more for greasing the cookie sheet
- 7 cups unbleached all-purpose flour
- egg wash (1 egg beaten with 1 tablespoon of water)
- poppy seeds or sesame seeds, for the top
- Mixing and storing the dough: Mix the yeast, salt, eggs, honey, and melted butter (or oil) with the water in a 5-quart bowl, or a lidded (no airtight) food container.
- Mix in the flour without kneading, using a spoon, a 14-cup capacity food processor (with dough attachment), or a heavy-duty stand mixer (with dough hook). If you’re not using a machine, you may need to use wet hands to incorporate the last bit of flour.
- Cover (not airtight), and allow to rest at room temperature until the dough rises and collapses (or flattens on top), approximately 2 hours.
- The dough can be used immediately after the initial rise, though it is easier to handle when cold. Refrigerate in a lidded (not airtight) container and use over the next 5 days. Beyond 5 days, freeze in 1-pound portions in an airtight container for up to 4 weeks. Defrost frozen dough overnight in the refrigerator before using. Then allow the usual rest and rise time.
- On baking day, butter or grease a cookie sheet or line with parchment paper, or a silicone mat. Dust the surface of the refrigerated dough with flour and cut off a 1-pound (grapefruit-size) piece. Dust the piece with more flour and quickly shape it into a ball by stretching the surface of the dough around to the bottom on all four sides, rotating the ball a quarter-turn as you go.
- Divide the ball into thirds, using a dough scraper or knife. Roll the balls between your hands (or on a board), stretching, to form each into a long, thin rope. If the dough resists shaping, let it rest for 5 minutes and try again. Braid the ropes, starting from the center and working to one end. Turn the loaf over, rotate it, and braid from the center out to the remaining end. This produces a loaf with a more uniform thickness than when braided from end to end.
- Allow the bread to rest and rise on the prepared cookie sheet for 1 hour and 20 minutes (or just 40 minutes if you’re using fresh, unrefrigerated dough).
- Twenty minutes before baking time, preheat the oven to 350°F If you’re not using a stone in the oven, 5 minutes is adequate. Brush the loaf with egg wash and sprinkle with the seeds.
- Bake near the center of the oven for about 25 minutes. Smaller or larger loaves will require adjustments in baking time. The challah is done when golden brown, and the braids near the center of the loaf offer resistance to pressure. Due to the fat in the dough, challah will not form a hard, crackling crust. Allow to cool before slicing or eating.
[custom-related-posts title=”Recommended Recipes Just For You” none_text=”None found” order_by=”date” order=”ASC”]