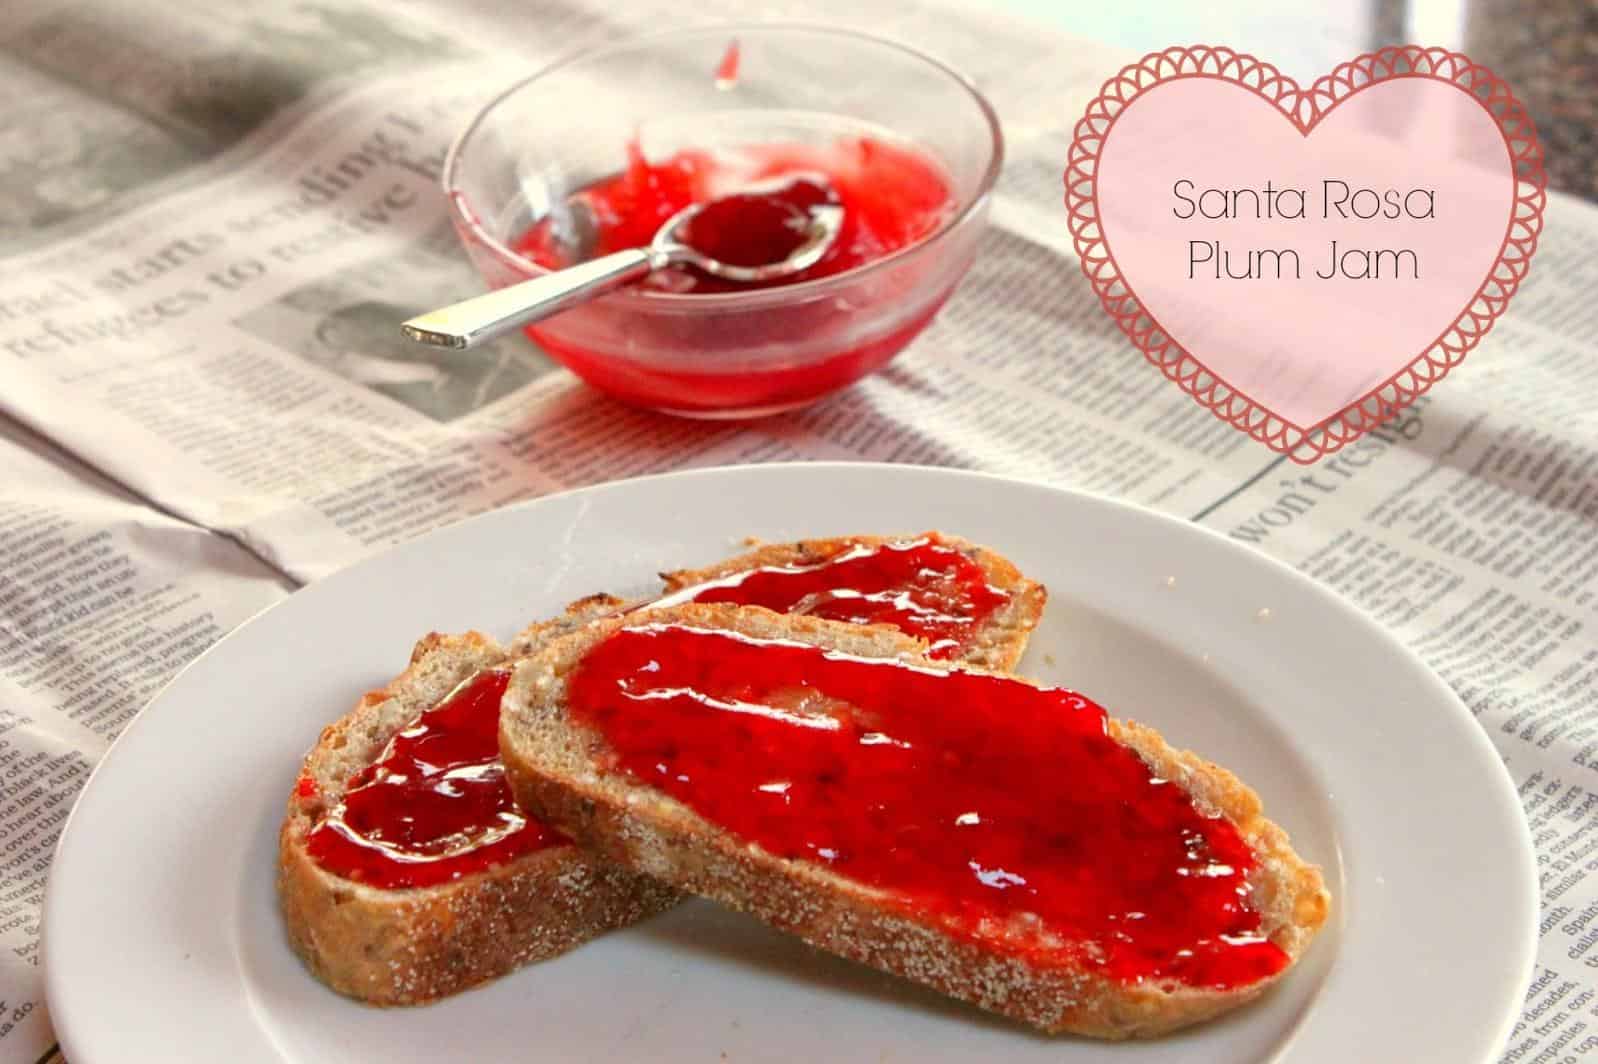
Bread Machine L&J Santa Rosa Plum Jam Recipe
Welcome to my Bread Machine L&J Santa Rosa Plum Jam Recipe! If you’re a fan of sweet and tangy jams, then you’re in for a treat. This recipe uses the delicious Santa Rosa plum, a sweet and juicy fruit that’s perfect for making jam.
Making homemade jam can be intimidating, but with the help of a bread machine, it’s easier than ever. This recipe uses simple ingredients and a few easy steps to create a delicious jam that’s perfect for spreading on toast, adding to yogurt, or even using as a glaze for meats.
Not only is this recipe easy to make, but it’s also a great way to use up any extra plums you may have on hand. Plus, since it’s made in a bread machine, you can set it and forget it while you go about your day.
So, let’s get started and make some delicious L&J Santa Rosa Plum Jam!
Why You’ll Love This Recipe
Are you a fan of homemade jams, but find the process of making them too time-consuming and complicated? Look no further than this Bread Machine L&J Santa Rosa Plum Jam Recipe. This recipe uses the convenience of a bread machine to make the jam-making process a breeze.
But why will you love this recipe? First of all, the star ingredient: Santa Rosa plums. These sweet and tart plums are the perfect base for a jam, and their deep red color adds a beautiful touch to any breakfast spread. Plus, this recipe uses Italian plums as well, which adds a nice depth of flavor.
Not only is this recipe easy to make, but it also requires minimal effort. The bread machine does all the work for you, from cooking down the plums to perfectly blending the ingredients. All you have to do is remove the skin from the plums, add them to the bread machine, and let it work its magic.
And the best part? This recipe uses simple ingredients that you probably already have in your kitchen, such as granulated sugar and water. No added pectin needed here. This means that you can make homemade jam without having to run to the store for special ingredients.
In short, you’ll love this recipe because it’s easy, delicious, and uses simple ingredients. Plus, there’s nothing like the satisfaction of making your own homemade jam. So, get ready to impress your breakfast guests with this delectable Santa Rosa plum jam!
Ingredient List
Before we start preparing our L&J Santa Rosa Plum Jam, let’s gather all the necessary ingredients. Here’s what you’ll need:
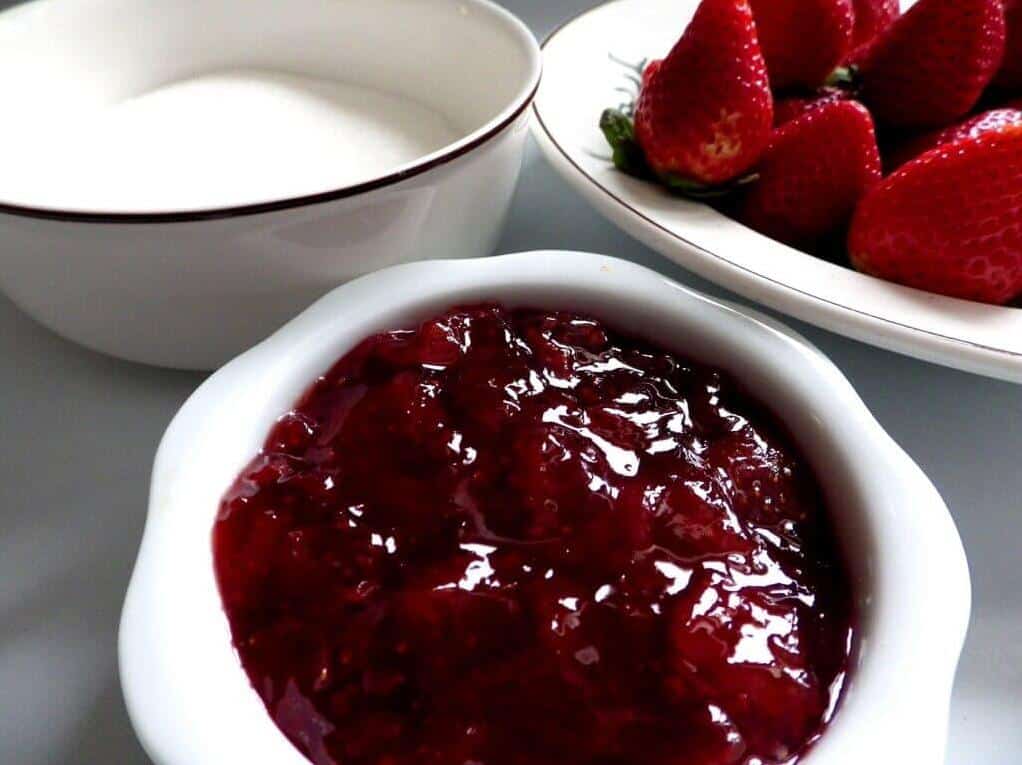
– Santa Rosa Plums
For this recipe, we’ll be using 3 pounds of Santa Rosa plums. The Santa Rosa plum is a perfect choice for making jam due to its high sugar content, which yields a rich and flavorful jam.
– Granulated Sugar
We’ll need 4 cups of granulated sugar to sweeten our jam. The sugar will also act as a preservative to help extend the shelf life of your homemade jam.
– Water
We’ll be adding 1/4 cup of water to help dissolve the sugar and prevent the jam from scorching.
– Sourdough Discard
If you have some sourdough discard lying around, it can be a great addition to this recipe. It provides a natural source of pectin, which helps thicken the jam. However, this ingredient is optional.
– Plum Syrup (Optional)
If you’re looking for a more concentrated plum flavor, you can add 1/4 cup of plum syrup to the recipe. This will give your jam a richer, deeper flavor.
– Italian Plums (Optional)
If Santa Rosa plums are not available, you can use Italian plums as a substitute. The taste will be slightly different, but the recipe will still work.
– Pectin (Optional)
If you want to ensure that your jam sets properly, you can add 1/4 inch of added pectin to the recipe. However, the Santa Rosa plums have enough natural pectin to produce a thick, spreadable jam without it.
Make sure to have a large pot, a bread machine or bread maker, and a water bath ready to cook your jam to perfection.
The Recipe How-To
Now that we’ve covered the ingredients, let’s dive into the recipe how-to for this L&J Santa Rosa Plum Jam.
Step 1: Prep the Plums
Remove the Skin: Begin by washing your Santa Rosa plums under cold water. Then, cut them in half and remove the pit. Next, remove the skin by placing the plums in boiling water for 30 seconds, then transferring them to an ice bath. The skin should easily peel off.
Step 2: Make the Plum Syrup
In a large pot, combine the peeled plums, granulated sugar, and water. Bring the mixture to a boil, stirring frequently. Reduce the heat and let the mixture simmer for 20 minutes. During this time, the plums will break down and create a syrupy consistency.
Step 3: Cook the Jam
Once the syrup is ready, transfer it to the bread machine. Add in your sourdough discard and turn the bread machine on to the jam setting. Let the mixture cook for approximately 2 hours, or until the jam has thickened and reached your desired consistency.
Step 4: Can the Jam
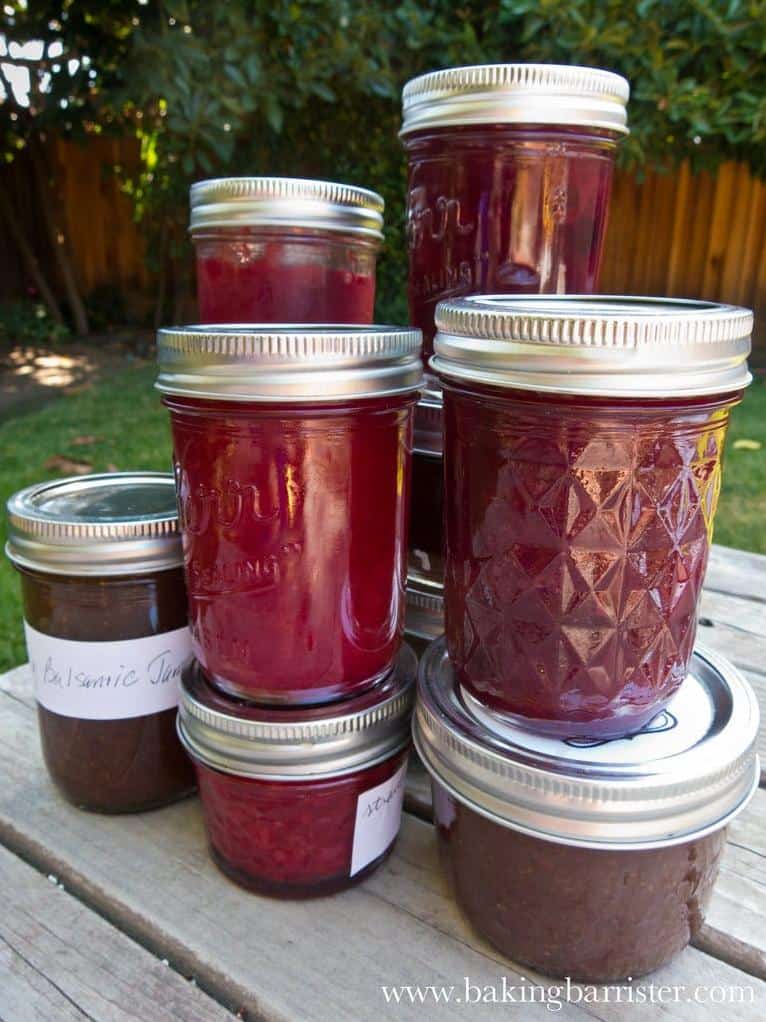
While the jam is cooking, sanitize your canning jars and lids according to the manufacturer’s instructions. Once the jam is finished, carefully pour it into the jars, leaving a 1/4 inch of headspace. Wipe the rims clean, then place the lids on top and screw on the bands.
Step 5: Water Bath
Place the jars in a water bath and process for 10 minutes. Once finished, remove the jars from the water bath and let them cool. Check the seals on the jars and store in a cool, dark place for up to one year.
Now that you know how to make this delicious L&J Santa Rosa Plum Jam in a bread machine, give it a try and enjoy the sweet taste of homemade jam on your favorite bread or as a topping for your favorite dessert.
Substitutions and Variations

This Santa Rosa Plum Jam recipe is versatile and lends itself well to substitutions and variations. Here are some ideas to make this recipe truly your own:
– Sugar: Instead of granulated sugar, try using brown sugar, honey, or maple syrup for a different flavor profile.
– Plums: While this recipe specifically calls for Santa Rosa plums, you can use other varieties such as Italian plums or even peaches. Just keep in mind that the cooking time may vary depending on the juiciness of the fruit.
– Pectin: If you prefer a firmer jam, you can add pectin to the recipe. Follow the instructions on the package for how much to use.
– Sourdough Discard: If you have some sourdough discard lying around, you can add it to the jam for a tangy flavor. Just mix in about 1/4 cup of discard with the plums and sugar before cooking.
– Remove Skin: If you prefer a smoother jam, you can remove the skin from the plums before cooking them. To do this, cut a small “X” on the bottom of each plum and blanch them in boiling water for about 30 seconds. Then, remove them from the water and peel off the skin.
– Water Bath: If you want to preserve your jam for longer, you can process it in a water bath. Just fill a large pot with enough water to cover the jars by 1-2 inches and bring it to a boil. Lower the jars into the water and process for 10 minutes (adjust for altitude if necessary). Remove the jars from the water and let them cool completely before storing.
Experimenting with different substitutions and variations is a fun way to make this recipe your own. Just remember to adjust cooking times and quantities as needed to ensure perfect results.
Serving and Pairing
Now that you have your freshly made L&J Santa Rosa Plum Jam, it’s time to enjoy it in all its delicious glory. This jam is incredibly versatile and can be used in a variety of ways to enhance your meals and snacks.
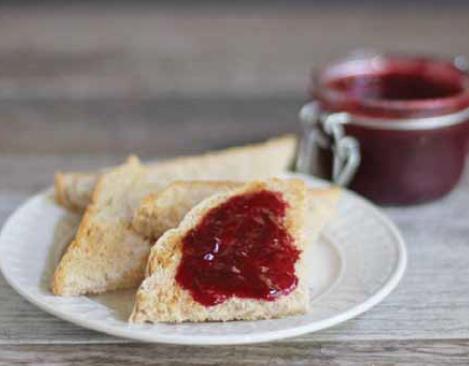
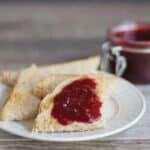
For a simple yet satisfying breakfast, spread a generous amount of this plum jam on top of your favorite toast or bagel. The sweet and tangy flavors of the jam perfectly complement the buttery and crispy texture of the bread, making for a mouthwatering start to your day.
If you’re feeling more adventurous, try using the L&J Santa Rosa Plum Jam as a glaze for your roasted meats or vegetables. The jam’s natural sweetness and acidity make it the perfect ingredient for balancing out the savory flavors of your dishes.
For a sweet and indulgent treat, pair this jam with a freshly baked scone or biscuit. The richness of the pastry combined with the fruity and slightly tart taste of the jam create a flavor explosion that will leave your taste buds begging for more.
If you’re a fan of cheese boards, this plum jam is an excellent addition to your spread. Its sweetness pairs perfectly with sharp and tangy cheeses like cheddar or gouda, while its texture makes it a great complement to creamy cheeses like brie or camembert.
Overall, the L&J Santa Rosa Plum Jam is a versatile and delicious condiment that can enhance a variety of meals and snacks. Experiment with different pairings to find your favorite way to enjoy this homemade jam.
Make-Ahead, Storing and Reheating
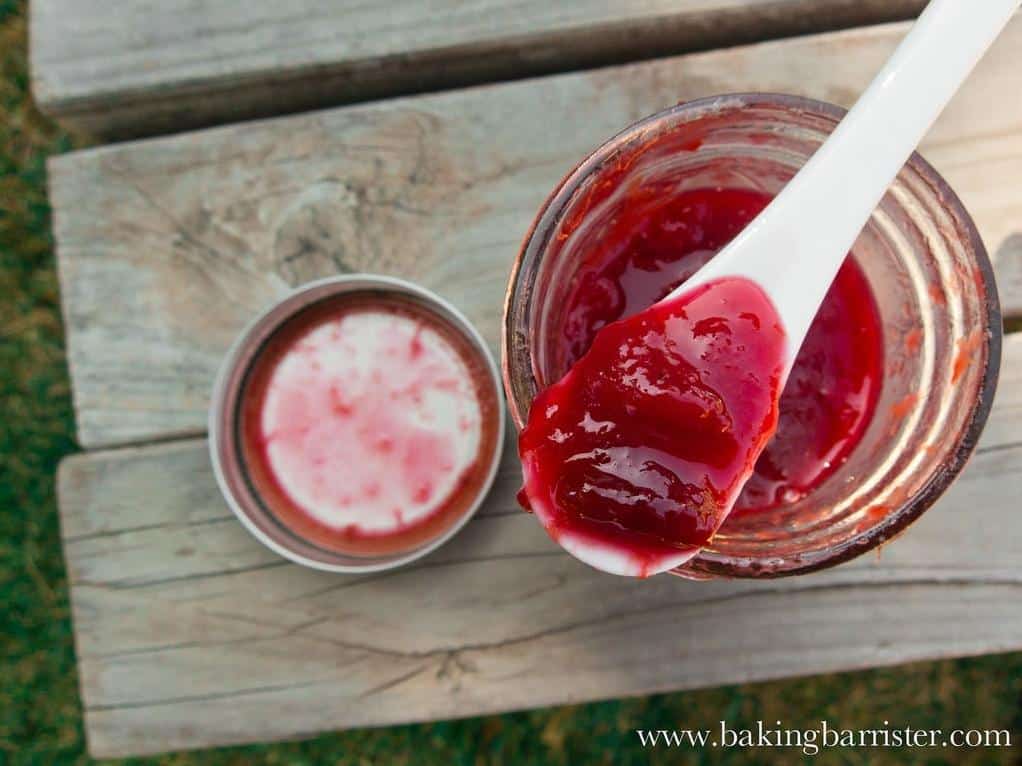
Once you’ve made a batch of L&J Santa Rosa Plum Jam using your bread machine, you’ll want to keep it fresh for as long as possible. Luckily, this jam can be stored in a variety of ways, allowing you to enjoy it long after you’ve made it.
To store your jam, it’s important to first make sure that your jars and lids are sterilized. You can do this by boiling them in a large pot of water for about 10 minutes. Once sterilized, fill each jar with the hot jam, leaving about 1/4 inch of headspace at the top. Wipe the rims of the jars with a clean cloth, then place the lids on top and screw on the bands.
You can store your jars of L&J Santa Rosa Plum Jam in the refrigerator for up to 3 weeks, or in the freezer for up to 6 months. To thaw frozen jam, simply place it in the refrigerator overnight.
If you’re planning on making a large batch of jam, you may want to consider canning it using a water bath method. This will allow you to store your jam at room temperature for up to a year.
To reheat your jam, simply place it in a small saucepan over low heat and stir until it reaches your desired consistency. You can also use your jam as a glaze for meats or as a topping for ice cream or pancakes.
With careful storage and reheating, you can enjoy the delicious taste of L&J Santa Rosa Plum Jam long after you’ve made it.
Tips for Perfect Results

Making jam can be a bit intimidating, but with a few key tips, you can make a perfect batch every time. Here are my top tips for ensuring your L&J Santa Rosa Plum Jam recipe turns out perfectly.
1. Choose Ripe Plums
When making plum jam, it’s important to choose ripe, juicy plums. Look for plums that are slightly soft to the touch and have a deep, rich color. The riper the plums, the sweeter the jam will be.
2. Remove the Skin
To remove the skin from your plums, simply score an “X” on the bottom of each fruit, then blanch them in boiling water for 30 seconds. Remove them from the boiling water and immediately place them in a bowl of ice water to stop the cooking process. The skins should then easily slide off.
3. Use Granulated Sugar
For the best results, use granulated sugar when making your L&J Santa Rosa Plum Jam recipe. This type of sugar dissolves easily and helps to thicken the jam.
4. Add Some Plum Syrup
After removing the skin from the plums, don’t discard the liquid. Instead, add it to the jam mixture. This will give your jam a deeper plum flavor and help it set.
5. Use a Water Bath
To ensure your jam stays fresh and safe to eat, it’s important to use a water bath. After filling your jars with jam, place them in a large pot of boiling water for 10 minutes. This will create a vacuum seal and help to preserve the jam.
6. Don’t Overcook
Cooking your jam for too long can result in a thick, hard consistency. To avoid this, cook the jam until it reaches 220°F on a candy thermometer. This will give you the perfect set without overcooking.
By following these tips, you’ll be able to make a delicious batch of L&J Santa Rosa Plum Jam every time. Enjoy it on toast, in yogurt, or even as a topping for ice cream.
FAQ
Before we conclude this recipe article, let’s address some frequently asked questions about making Santa Rosa Plum Jam in a bread machine. Whether you’re a beginner or a seasoned cook, you may have some questions about the process or ingredients. In this section, we’ll provide some helpful answers to common queries.
Do you remove skin from plums before making jam?
When it comes to making jam with stone fruits, plums are a fantastic choice. One of the reasons for this is that unlike other stone fruits, you don’t have to peel plums before making jam. This is because the skin of plums contains pectin, a natural thickening agent that helps the jam to set properly. So, when making plum jam, keeping the skin on is not only easier but also beneficial for the final texture of the jam.
What are the best plums for making jam?
There are two types of plums that are typically grown for commercial purposes: European and Japanese. The European variety, also known as prune plums, are often dried due to their thick skins, high sugar content, and dense flesh. These characteristics also make them great for baking and creating jams.
Does plum jam need a water bath?
Before diving into the canning process for plum jam, make sure you have a water bath canner prepped and ready to go. Once your jam has reached the proper gel stage, carefully scoop it into your canning jars, leaving about 1/4 inch of space at the top. Don’t forget to give the rims a good wipe down, release any air bubbles, and double-check that the headspace is still at that 1/4 inch mark. This will ensure your plum jam is perfectly preserved for future enjoyment.
Do you use red or black plums for jam?
When making plum jam, it’s best to select ripe plums that are either of the black or Italian plum variety. While I personally favor black plums, Italian plums tend to be sweeter in taste. However, feel free to choose the type of plum that appeals most to your taste buds.
Bottom Line
In conclusion, making homemade jam using a bread machine is a fun and easy way to enjoy fresh fruits all year round. With this L&J Santa Rosa Plum Jam Recipe, you can transform the sweet and juicy Santa Rosa plums into a delicious spread that you can enjoy on toast, biscuits, and even as a topping for ice cream.
By following the simple steps outlined in this recipe, you can create a batch of flavorful and aromatic plum jam that will leave your taste buds yearning for more. And with the helpful tips and tricks provided in this article, you can ensure that your jam turns out perfectly every time.
So why not give this recipe a try and experience the joy of making homemade jam in your bread machine? Not only will you be able to control the quality of your ingredients, but you’ll also be able to enjoy the satisfaction of creating something delicious from scratch. Trust me, once you try this recipe, you’ll never want to go back to store-bought jams again!
Bread Machine L&J Santa Rosa Plum Jam Recipe
Leslie and Jim have a Santa Rosa plum tree. Here is the recipe for the jam we made from that tree’s delicious fruit. Use a bread machine with a Jam setting and at least a 9 cup bowl to make this jam or use your stove with a heavy bottom pan that can hold at least 10 cups of jam.
- 7 cups plums, with the pit removed
- 2 1/2 cups granulated sugar
- 4 tablespoons low-sugar pectin
- 1. Strain cut fruit to remove excess juice, saving the juice in the fridge for other projects.
- 2. Pure the fruit with an immersion blender or hand-crank food mill.
- 3. Place fruit, sugar and pectin in the 9-cup bowl of your bread maker.
- 4. Stir gently to combine.
- 5. Put bowl into the bread maker and close the lid.
- 6. Select the jam setting on the bread maker and press start.
- 7. Once the jam cooking cycle is finished (CAUTION: EXTREMELY HOT JAM AND STEAM) remove the bowl from the bread maker.
- 8. Stir the jam gently to combine anything that has risen to the top of the bowl.
- 9. Taste the jam (dip spoon into jam and let it cool) and add up to 1/2 cup of sugar to balance out the sweet-sour taste.
- 10. If you will refrigerate or freeze the jam, let it cool slightly then put in clean containers and place in the fridge/freezer.
- 11. If you will can the jam, follow a safe canning such as the USDA guide to home canning:
- nchfp.uga.edu/publications/publications_usda.html.
- NOTE: Frozen or properly canned jam should be eaten within a year. Refrigerated jam should be eaten within 3-4 months.
[custom-related-posts title=”Recommended Recipes Just For You” none_text=”None found” order_by=”date” order=”ASC”]