The Ultimate Sponge Dough Recipe for Perfect Bakes
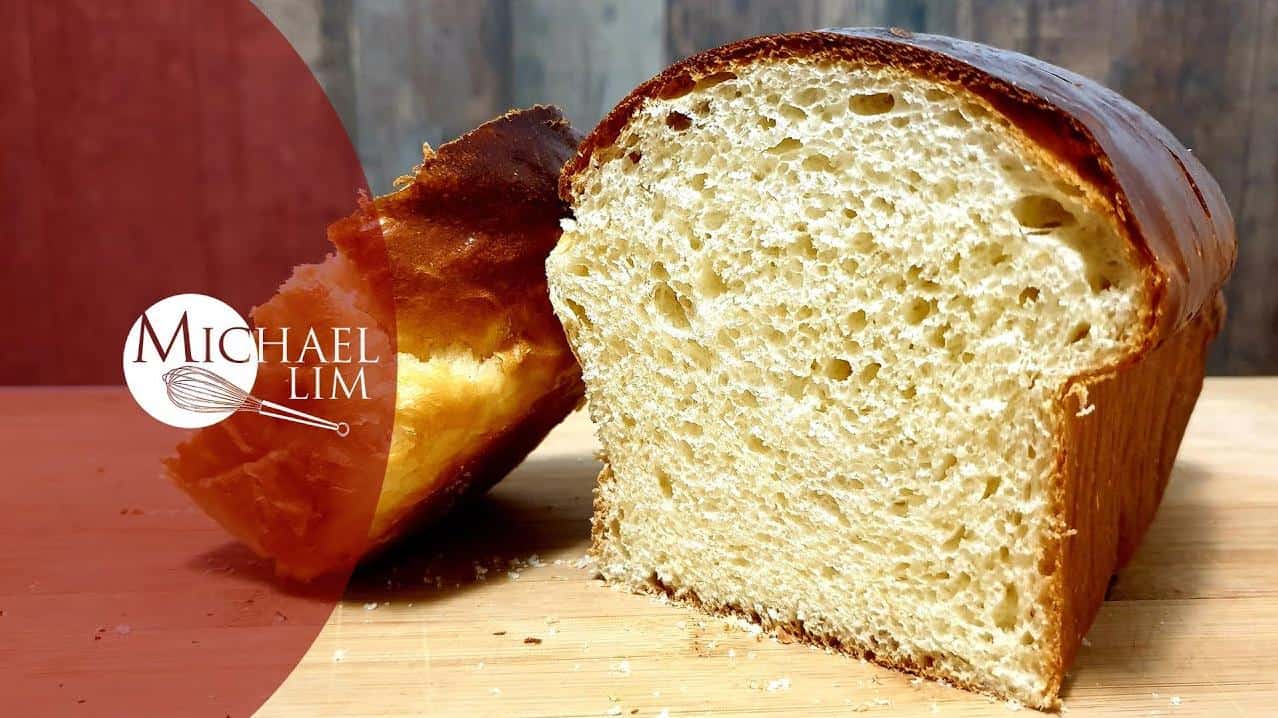
Welcome to my sponge dough recipe article! If you’re a bread lover, you’ll know that there’s nothing quite like the smell and taste of fresh, homemade bread straight from the oven. And with this recipe, you’ll be able to achieve soft, fluffy, and delicious bread every time.
The sponge dough method is an age-old technique used in bread making that produces bread with a moist, tender, and slightly sour flavor. It’s a technique that has been passed down from generation to generation, and it’s still used by many professional bakers today.
In this article, I will be sharing with you my own take on the sponge dough method, complete with detailed instructions and tips for perfect results. So whether you’re a seasoned baker or a novice in the kitchen, get ready to impress your friends and family with this delicious recipe. Trust me; once you try this bread, you’ll never go back to store-bought bread again!
Why You’ll Love This Recipe
Are you tired of the same old boring bread recipes? Look no further than this sponge dough recipe. This recipe is perfect for those who love soft and fluffy bread with a crispy crust. The sponge dough method used in this recipe allows for a longer fermentation process, which leads to more complex flavors in your bread. Trust me, your taste buds will thank you!
The ingredients for this recipe are simple and easy to find. All you need is bread flour, active dry yeast, salt, honey, and water. The use of honey in this recipe adds a subtle sweetness to the bread without overpowering the flavor. The combination of these ingredients creates a dough that is easy to work with and yields perfect results every time.
One of the best things about this recipe is its versatility. You can use the sponge dough method to make a variety of bread, from basic white bread to whole wheat bread. You can also add in your favorite ingredients, such as cheese or sausage, to create unique and flavorful bread. The possibilities are endless!
Not only is this recipe delicious, but it is also a healthier alternative to store-bought bread. Making your own bread allows you to control the ingredients, ensuring that there are no preservatives or additives. Plus, the act of bread making can be therapeutic and a great stress-reliever.
In conclusion, this sponge dough recipe is perfect for anyone who loves soft and fluffy bread with a crispy crust. The versatility of the recipe allows for endless possibilities, and the use of simple, wholesome ingredients makes it a healthier alternative to store-bought bread. Give this recipe a try, and I promise you won’t be disappointed!
Ingredient List

Before we start making our sponge dough, let’s take a look at the ingredients we will need. Here are the ingredients 1 for our sponge dough recipe:
- Bread Flour (4 cups)
- Water (2 cups, lukewarm, 105-115°F)
- Active Dry Yeast (1 teaspoon)
- Salt (1 teaspoon)
- Honey (1 tablespoon)
- Olive Oil (3 tablespoons)
These ingredients will be used for the sponge dough method which requires a bread sponge to be made first. The bread sponge is a mixture of flour, yeast, and water that is allowed to ferment for several hours before being added to the final dough. This process helps to develop the flavor and texture of the bread.
You may also substitute some of the ingredients to make variations. Check out the next section to learn more.
The Recipe How-To
To make the sponge dough, mix 1 cup of bread flour, 1 teaspoon of active dry yeast, and 1 cup of lukewarm water (105-115°F) in a large bowl until well combined. Cover the bowl with a plastic wrap and let it rest at room temperature for about 30 minutes. The mixture should be thick and bubbly.
Making the Dough
After the sponge has rested, add 2 cups of bread flour, 2 teaspoons of salt, and 1 tablespoon of honey to the bowl. Mix well until the dough comes together.
Knead the dough on a lightly floured surface for 5-10 minutes until it becomes smooth and elastic. Form the dough into a ball and place it in a greased bowl. Cover with a plastic wrap and let it rise in a warm place until it doubles in size, about 1-2 hours.
Shaping and Baking the Dough
After the first rise, punch down the dough and shape it into a loaf or rolls. Place the dough in a greased loaf pan or on a baking sheet for rolls. Cover with a plastic wrap and let it rise again until it doubles in size, about 1 hour.
Preheat the oven to 350°F. Brush the dough with olive oil and bake for 30-40 minutes until the bread is golden brown and sounds hollow when tapped.
Remove the bread from the oven and let it cool on a wire rack for 10-15 minutes before slicing and serving.
Using the Sponge Dough Method
The sponge dough method is a popular bread-making technique that involves creating a bread sponge before making the dough. This method helps to improve the bread’s texture and flavor. To use the sponge dough method, make the bread sponge by mixing 1 cup of bread flour, 1/4 teaspoon of active dry yeast, and 1/2 cup of lukewarm water (105-115°F) in a large bowl. Cover the bowl with a plastic wrap and let it rest at room temperature for 8-12 hours.
After the bread sponge has rested, add the remaining ingredients and follow the recipe above.
Tips for Perfect Results
- Use bread flour for a better texture and flavor.
- Make sure the water is at the right temperature to activate the yeast.
- Knead the dough until it becomes smooth and elastic.
- Let the dough rise in a warm, draft-free place.
- Brush the dough with olive oil before baking for a crispy crust.
- Let the bread cool before slicing to prevent it from crumbling.
Now that you know how to make sponge dough, try using it to make different types of bread, such as white bread, whole wheat bread, or sausage buns. The possibilities are endless!
Substitutions and Variations

While the sponge dough recipe is a classic and reliable method for making soft and fluffy bread, there are several substitutions and variations you can try to tailor the recipe to your preferences. Here are some ideas to get you started:
– Flour: While bread flour is the best option for making sponge dough, you can also use all-purpose flour or a combination of bread flour and whole wheat flour for a heartier texture and nuttier flavor.
– Yeast: If you don’t have active dry yeast, you can use instant yeast or fresh yeast instead. Just make sure to adjust the amount accordingly and follow the manufacturer’s instructions.
– Water: While lukewarm water is the best option for activating the yeast and developing the gluten, you can also use cold water or warm milk for a richer and softer dough.
– Honey: If you don’t have honey, you can use sugar, maple syrup, agave nectar, or any other sweetener of your choice. Just keep in mind that honey adds a subtle floral note and helps to brown the crust.
– Salt: If you want to reduce the sodium content, you can use less salt or substitute it with a low-sodium alternative. However, keep in mind that salt enhances the flavor and helps to control the fermentation process.
– Olive oil: If you don’t have olive oil, you can use any other neutral oil such as vegetable oil, canola oil, or avocado oil. Just make sure to use a high-quality oil for the best results.
– Sausage buns: For a savory twist on the classic sponge dough recipe, you can add chopped cooked sausage, cheese, herbs, or any other filling of your choice to the dough. Just make sure to adjust the seasoning and baking time accordingly.
– Hokkaido loaf: If you want to try a more exotic variation of the sponge dough recipe, you can make a Hokkaido loaf using natural yeast and a tangzhong sponge method. This will result in a soft and pillowy bread with a slightly sweet and tangy flavor.
– Sourdough starter: If you want to use a sourdough starter instead of commercial yeast, you can adapt the sponge dough method by using a poolish or a sponge cake. This will help to develop the natural fermentation and acidity of the dough, resulting in a more complex and flavorful bread.
– Cream cheese buns: For a decadent dessert or breakfast option, you can make cream cheese buns using
Serving and Pairing

This sponge dough recipe is versatile and can be used to make a variety of breads, from white bread to whole wheat to sausage buns. Once baked, these breads can be served and paired with a variety of foods.
For a classic pairing, slice up a fresh loaf of white bread and serve it alongside a hearty bowl of soup or a plate of pasta. The soft, fluffy texture of the bread will perfectly complement the warmth and heartiness of the dish.
If you’re looking for something a bit more savory, try making sausage buns using the sponge dough method. These buns are perfect for a quick snack or a grab-and-go breakfast. Serve them with a side of scrambled eggs or a cup of coffee for a delicious and satisfying meal.
For those who love a healthy meal, try pairing the whole wheat bread made with this recipe with a fresh salad or a bowl of vegetable soup. The nutty flavor and hearty texture of the bread will pair perfectly with the crisp, fresh flavors of the salad or soup.
If you’re feeling adventurous, try serving the bread with a unique and flavorful spread, such as olive tapenade or honey butter. These spreads will add an extra layer of complexity and flavor to the bread, making it an even more delicious and memorable experience.
No matter how you choose to serve and pair your sponge dough bread, it is sure to be a hit at the table. The soft, fluffy texture and delicious flavor will leave everyone wanting more.
Make-Ahead, Storing and Reheating

One of the best things about this sponge dough recipe is that it can be made ahead of time and stored for later use. After preparing the dough, you can cover it with plastic wrap and store it in the refrigerator for up to 3 days. This is especially helpful if you have a busy schedule and want to save time on the day you plan to bake.
When you’re ready to bake, simply take the dough out of the refrigerator and let it sit at room temperature for 30 minutes to 1 hour. This will allow the dough to come to room temperature and rise a bit more before baking. Then, follow the baking instructions as usual.
If you have leftovers, don’t worry! This bread can be easily reheated in the oven or toaster. To reheat in the oven, preheat the oven to 350°F, wrap the bread in aluminum foil, and bake for 10-15 minutes until warm. To reheat in the toaster, slice the bread and toast until warm and crispy.
If you want to store the bread for a longer period of time, you can freeze it. After baking and cooling the bread, wrap it tightly in aluminum foil or plastic wrap and place it in a freezer-safe bag. The bread can be stored in the freezer for up to 3 months. When you’re ready to eat it, simply thaw it at room temperature or in the refrigerator, and reheat as desired.
Overall, this sponge dough recipe is a great option for those who want to save time and have fresh bread on hand whenever they need it. It’s a versatile recipe that can be easily adapted to different types of bread, such as whole wheat or sausage buns, using the sponge dough method. Just remember to follow the storage and reheating tips to ensure that your bread stays fresh and delicious for as long as possible.
Tips for Perfect Results

Now that you know the basics of the sponge dough recipe method, it’s time to take your baking skills to the next level! Here are some tips to ensure that your sponge dough turns out soft, fluffy, and delicious every time:
1. Use high-quality ingredients: The quality of your ingredients can make a huge difference in the final outcome of your sponge dough. Use fresh, high-quality bread flour, active dry yeast, and lukewarm water for the best results.
2. Measure your ingredients accurately: Baking is a science, so it’s important to measure your ingredients accurately. Use a kitchen scale to measure your flour and yeast, and use measuring cups and spoons for the water, salt, and honey.
3. Use the right water temperature: The water temperature is crucial for activating the yeast and creating a good sponge dough. Use lukewarm water between 105-115°F (40-46°C) to activate the yeast and create a warm environment for the dough to rise.
4. Give your dough enough time to rise: Patience is key when making sponge dough. Allow enough time for the dough to rise properly, usually between 1-2 hours depending on the recipe.
5. Don’t over-knead your dough: Over-kneading your dough can result in tough, chewy bread. Knead your dough until it’s smooth and elastic, but stop once you reach that point.
6. Experiment with variations: The sponge dough method is versatile and can be used to make a variety of breads and buns. Experiment with different flours, add-ins, and shapes to create unique and delicious baked goods.
7. Brush with olive oil before baking: Brushing your sponge dough with a little bit of olive oil before baking can help create a crispy crust and add some flavor to your bread.
8. Let your bread cool completely before slicing: It’s tempting to slice into a fresh loaf of bread right away, but letting it cool completely will result in cleaner slices and a better texture.
By following these tips, you’ll be well on your way to becoming a sponge dough expert and creating delicious breads and buns in no time!
Bottom Line
In conclusion, the sponge dough method is an excellent way to make soft, fluffy, and delicious bread. With a little patience and practice, you can master this method and make bread like a pro. Whether you’re a beginner or an experienced baker, this recipe is perfect for you. Not only is it easy to follow, but it’s also versatile and can be customized to suit your taste. So why not give it a try? I guarantee that you’ll love the results. And who knows, you might even discover your new favorite bread recipe! So go ahead and start baking with the sponge dough method today. Happy baking!
Sponge Dough Recipe

another way my family made a pizza dough its pretty interesting and great to try:)
- 1 teaspoon active dry yeast
- 3 cups bread flour
- 1 1/4 cups lukewarm water (105 to 115 F)
- 1 1/2 teaspoons honey
- 1 teaspoon salt
- 1 tablespoon olive oil
- Crisco (for greasing pans)
- Prepare dough sponge and proof yeast by mixing yeast, 1/2 cup flour, and 1/2 cup water with 1/2 teaspoons honey dissolved in the water in a bowl and letting stand for 20 minutes until mixture is foamy. (Throw out and start over with fresher yeast if not foamy.)
- Mix 1/2 of remaining flour with salt, remaining water with remaining honey dissolved in it, olive oil, and dough sponge. Mix in remaining flour (dough should be slightly sticky and not dry). Knead 15 minutes on a floured surface (10 minutes in a machine) until smooth. Use following Rise Method I or II:
- Rise Method I (normal): Place dough in lightly oiled bowl and cover with plastic wrap. Let rise until doubled (about 1 to 1 1/2 hours) in a warm place. Punch dough down and divide in half. Dust dough portions with flour and put in ziploc bags in the freezer for 30 minutes (stops rising) and then move to refrigerator until ready to use.
- Rise Method II (refrigerator): Divide dough in half. Dust dough portions with flour and put in ziploc bags in the refrigerator for two days.
- Remove dough portion from refrigerator when ready to shape into crust. Punch down dough thoroughly and spread/stretch dough portion by hand and roller on a greased pizza pan. Move dough crust to pizza peel spread with coarse cornmeal or to pizza screen. Add sauce, cheese, and toppings and bake in preheated 500° F oven directly on the pizza stone for 8-10 minutes or until crust is golden brown. Cool 2-3 minutes on a wire rack before cutting and serving.
[custom-related-posts title=”Recommended Recipes Just For You” none_text=”None found” order_by=”date” order=”ASC”]