Authentic Olive-Rosemary Bread – Cook’s Illustrated Recipe
Welcome to my kitchen, where I’ll be sharing my recipe for authentic olive-rosemary bread inspired by Cook’s Illustrated. This bread is a perfect combination of savory and aromatic flavors that will make your taste buds dance with joy.
Bread baking can seem intimidating, but I assure you it’s worth the effort. There’s something special about kneading bread dough, watching it rise, and smelling the aroma of fresh bread as it bakes. Plus, there’s nothing like the satisfaction of slicing into a warm loaf of homemade bread.
This recipe is perfect for anyone looking to elevate their bread-baking skills. The ingredients are simple, and the process is straightforward. Even if you’re new to bread baking, you can create a delicious loaf of olive-rosemary bread that will impress your family and friends.
So, let’s get started! Join me in the kitchen, and I’ll guide you through the steps to make this authentic olive-rosemary bread.
Why You’ll Love This Recipe
Before we delve into the specifics of the ingredients and process, let me tell you why you’ll absolutely fall in love with this authentic olive-rosemary bread recipe from Cook’s Illustrated.
Firstly, the aroma of freshly baked bread is simply irresistible. The smell of rosemary and olive oil wafting through the house will make your mouth water and leave you feeling cozy and warm.
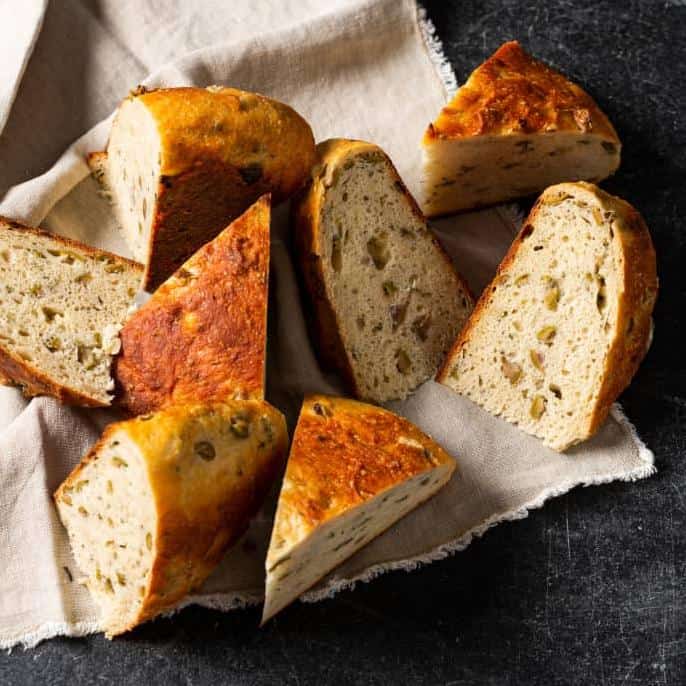
Secondly, the taste is out of this world. The combination of fresh rosemary, olives, and honey creates a unique and savory flavor that’s both satisfying and comforting. The bread is light and fluffy with a crunchy crust that’s perfect for dipping into olive oil and balsamic vinegar.
Thirdly, this bread is incredibly versatile. It pairs well with soups, salads, or just as a standalone snack. You can also use it as a base for sandwiches or toast it with some parmesan cheese for a quick snack.
Lastly, making this bread is a fun and rewarding experience. The process is straightforward, and the end result is a beautiful and delicious loaf that will impress your friends and family.
In summary, this recipe is not only delicious but also a great way to impress your loved ones with your baking skills. So, grab your apron and get ready to bake the most authentic and mouthwatering olive-rosemary bread you’ve ever tasted!
Ingredient List
Before starting to bake the Authentic Olive-Rosemary Bread, it is important to gather all the ingredients to ensure a smooth process. All the ingredients used in this recipe are easily accessible and can be found in your local grocery store. Here is a list of ingredients you will need:
Ingredients:
- Bread flour: 4 cups
- Whole wheat flour: 3/4 cup
- Instant yeast: 2 teaspoons
- Kosher salt: 1 1/2 teaspoons
- Fresh rosemary: 2 tablespoons, finely chopped
- Kalamata olives: 1/2 cup, pitted and chopped
- Water: 2 cups
- Honey: 2 tablespoons
- Olive oil: 1/4 cup
These simple ingredients come together to create the perfect olive-rosemary bread that is light, fluffy, and packed with flavor. The combination of the fresh rosemary and kalamata olives creates a unique and savory taste that will leave you wanting more.
The Recipe How-To
Now, let’s get down to business and dive into the recipe itself. Below are the steps you need to follow to make the Authentic Olive-Rosemary Bread from Cook’s Illustrated Recipe.
Step 1: Make the Dough
In a large mixing bowl, whisk together 4 cups of bread flour, 1 cup of whole wheat flour, 2 teaspoons of kosher salt, and 2 teaspoons of fast-rise yeast (or instant yeast). Add 2 tablespoons of honey, 2 tablespoons of olive oil, 1/4 cup of finely chopped fresh rosemary, and 1 1/2 cups of lukewarm water. Mix until the dough comes together and forms a shaggy ball.
Step 2: Knead the Dough
Turn the dough onto a floured surface and knead it for about 10 minutes until it becomes smooth and elastic. Alternatively, you can use a stand mixer with a dough hook attachment to knead the dough for 5-7 minutes until it becomes light and fluffy.
Step 3: Let the Dough Rise
Place the dough in a lightly oiled bowl and cover it with plastic wrap. Let it rise in a warm place for about 1 hour or until it doubles in size.
Step 4: Shape the Dough
Punch down the dough and turn it onto a lightly floured surface. Knead in 1 cup of pitted and chopped kalamata olives until they are evenly distributed throughout the dough. Shape the dough into a ball and place it on a parchment-lined baking sheet.
Step 5: Let the Dough Rise Again
Cover the dough with a damp kitchen towel and let it rise for another 30 minutes.
Step 6: Bake the Bread
Preheat the oven to 450°F (230°C). Use a sharp knife to make a few shallow slashes across the top of the dough. Brush the top of the dough with a mixture of 1 tablespoon of olive oil and 1 tablespoon of chopped rosemary. Bake the bread for 25-30 minutes or until the top is golden brown and the bread sounds hollow when tapped on the bottom.
Step 7: Cool and Serve
Remove the bread from the oven and let it cool on a wire rack for at least 30 minutes before slicing and serving. Enjoy your freshly baked Authentic Olive-Rosemary Bread with a drizzle of olive oil and a sprinkle of sea salt.
Substitutions and Variations
While the authentic olive-rosemary bread recipe is already delicious on its own, there are several ingredient substitutions and variations you can try to put your own spin on this classic bread recipe. Here are a few ideas to get you started:
– Kalamata Olives: If you’re not a fan of green olives, try using kalamata olives instead. They have a deeper, richer flavor that pairs beautifully with the rosemary and honey in this recipe.
– Gluten-Free: To make this recipe gluten-free, you can substitute the bread flour and whole wheat flour with a gluten-free flour blend. Keep in mind that the texture and flavor may be slightly different, so you may need to adjust the amount of liquid and rise time.
– Parmesan Bread: For a cheesy twist on this recipe, add 1/2 cup of freshly grated Parmesan cheese to the dough before baking. The salty, nutty flavor of the cheese pairs perfectly with the rosemary and olive oil.
– Sourdough Bread: If you’re a fan of sourdough bread, you can use a sourdough starter instead of fast-rise or instant yeast. Keep in mind that the rise time will be longer and the flavor will be tangier.
– No-Knead Bread: If you don’t want to spend a lot of time kneading the dough, you can try making a no-knead version of this bread. Simply mix the ingredients together, let the dough rise for 12-18 hours, shape it into a loaf, and bake it in a Dutch oven.
– Italian Focaccia: To make this bread into an Italian-style focaccia, roll the dough out into a large rectangle and sprinkle it with coarse sea salt and chopped fresh rosemary. Drizzle it with olive oil and bake it on a pizza stone until crispy and golden brown.
No matter which substitutions or variations you choose, be sure to adjust the baking time and temperature as needed to ensure that your bread turns out light, fluffy, and perfectly golden brown.
Serving and Pairing
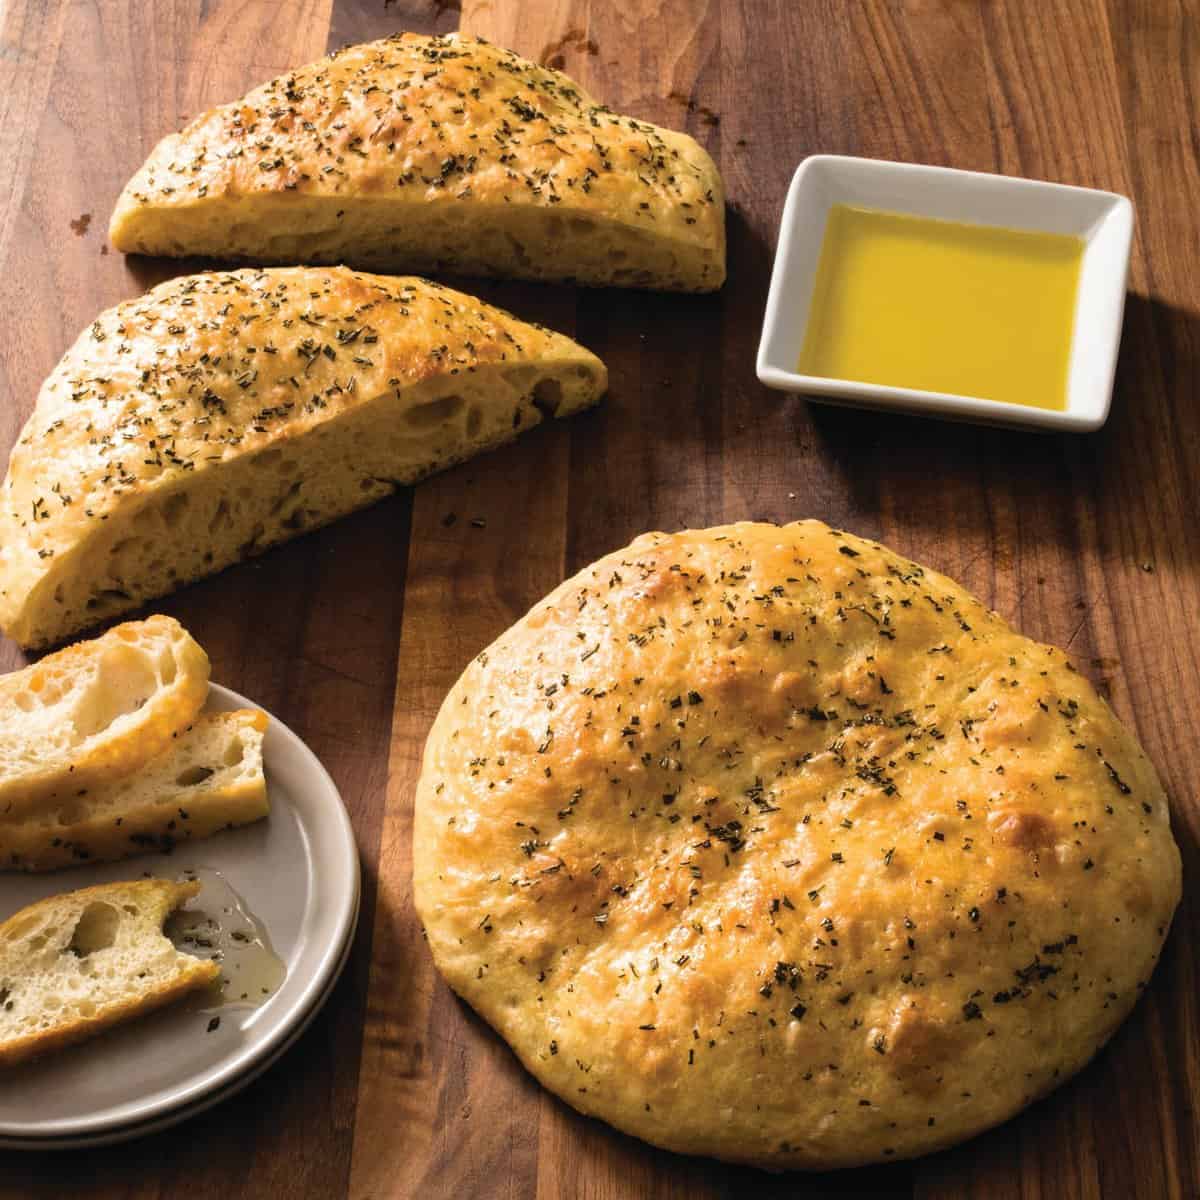
This olive-rosemary bread is a flavorful and aromatic bread that is perfect for serving on its own or as an accompaniment to a variety of dishes. When it comes to serving, there are plenty of options to choose from. You can slice it up and serve it as a side to a hearty soup or stew, or you can serve it warm with a drizzle of olive oil and some balsamic vinegar as an appetizer.
This bread also pairs well with a variety of foods. One of my favorite ways to enjoy it is with some roasted garlic and a chunk of Parmesan cheese. The combination of the savory garlic and the nutty Parmesan cheese perfectly complements the earthy flavors of the bread.
Another great pairing is with a simple green salad. The bread adds a nice crunch and texture to the salad and the rosemary flavor provides a nice contrast to the fresh greens.
For a heartier meal, try serving the bread with some grilled vegetables or roasted meat. The bread’s bold flavors can hold its own against the richness of the meat and the smokiness of the vegetables.
Overall, this olive-rosemary bread is a versatile and delicious bread that can be served in a variety of ways. Experiment with different pairings and find your favorite way to enjoy it.
Make-Ahead, Storing and Reheating

One of the best things about this olive-rosemary bread is that it can be made in advance and stored for later consumption. You can make the dough ahead of time and let it rise overnight in the refrigerator, so it’s ready to be baked fresh in the morning. This is especially useful if you want to serve fresh bread for breakfast or brunch without having to wake up extra early to prepare it.
To store the bread after baking, wrap it tightly in plastic wrap or aluminum foil. It can be stored at room temperature for up to 3 days. If you’re planning on keeping it for longer, it’s best to freeze it. Simply wrap the bread in plastic wrap and then place it in a resealable freezer bag. It can be stored in the freezer for up to 1 month.
When it’s time to reheat the bread, preheat your oven to 375°F. Remove the bread from the plastic wrap or foil and place it on a baking sheet. Bake for 10-15 minutes or until the bread is warmed through and the crust is crispy again. You can also reheat individual slices in the toaster or toaster oven.
One thing to keep in mind is that this bread is best served fresh. While reheating can bring back some of the texture and flavor, it won’t be the same as when it’s freshly baked. So, it’s always recommended to bake a fresh batch whenever possible.
Tips for Perfect Results
To ensure your olive-rosemary bread turns out perfectly every time, here are a few tips to consider:
1. Use fresh rosemary
Fresh rosemary is the key to achieving the best flavor in this bread recipe. Make sure to use fresh rosemary and chop it finely to distribute the flavor evenly.
2. Use bread flour and whole wheat flour
Bread flour and whole wheat flour have higher protein content, which helps to create a chewy and sturdy texture in bread. You can use all-purpose flour, but the texture will be softer and less chewy.
3. Use instant yeast
Instant yeast is more potent than active dry yeast, which means you can use less and get better results. Make sure to measure your yeast accurately to ensure the bread rises properly.
4. Use a Dutch oven for baking
Using a Dutch oven creates a steamy environment that helps the bread rise and develop a crispy crust. If you don’t have a Dutch oven, you can use a baking sheet and create steam by placing a pan of water on the bottom of the oven.
5. Let the dough rise slowly in the fridge
Slow fermentation in the fridge allows the bread to develop more complex flavors and a chewy texture. You can let the dough rise in the fridge for up to 24 hours before baking.
6. Score the bread before baking
Scoring the bread allows it to expand and release steam during baking, which helps to create a crispy crust. Use a sharp knife to make shallow cuts on the surface of the dough before baking.
7. Let the bread cool before slicing
Allow the bread to cool for at least 30 minutes before slicing it. This allows the crumb to set and prevents the bread from becoming too dense.
By following these tips, you’ll be able to create an authentic olive-rosemary bread that is light, fluffy, and full of flavor.
Bottom Line
In conclusion, this authentic olive-rosemary bread recipe is a must-try for all bread lovers out there. The combination of fresh rosemary, olives, and olive oil creates a delicious aroma and flavor that will make you want to bake this bread every day. With the help of this recipe and the tips provided, you can make the perfect loaf of bread that is light, fluffy, and bursting with flavor.
Whether you are a beginner or an experienced baker, this recipe is easy to follow and will yield delicious results every time. So, why not give it a try? Impress your family and friends with your homemade artisan bread, and pair it with your favorite cheese, soup, or salad.
Remember, baking is not only about the end product but also about the process. Take your time, enjoy the kneading and baking, and let the aroma of rosemary fill your kitchen. With this recipe and the right ingredients, you can create a masterpiece that will satisfy your taste buds and warm your heart.
So, don’t hesitate, get your apron on, and start baking this authentic olive-rosemary bread today. Trust me, you’ll love it!
Authentic Olive-Rosemary Bread – Cook’s Illustrated Recipe
Published in Cook’s Illustrated, March-April 2007. Almost any variety of brined or oil-cured olive works in this recipe. However, Cook’s Illustrated testers preferred a mix of both green and black olives. The bread will keep for up to 2 days, well wrapped and stored at room temperature. To recrisp the crust, place the bread in a 450°F oven for 5-10 minutes. The bread will keep froze for several months when wrapped in foil and placed in a large zipper-lock bag.
- 1 3/4 cups water, room temperature
- 2 teaspoons fast rise yeast or 2 teaspoons instant yeast
- 2 tablespoons honey
- 3 1/2 cups bread flour (plus extra as needed for dough and counter)
- 1/2 cup whole wheat flour
- 2 teaspoons salt
- 2 tablespoons chopped fresh rosemary
- 1 1/2 cups pitted olives (rinsed, chopped rough, and patted dry)
- Whisk water, yeast, and honey in bowl of standing mixer. Add flours and mix on low speed with dough hook until cohesive dough is formed, about 3 minutes. Cover bowl with plastic wrap and let sit at room temperature for 20 minutes.
- Remove plastic wrap; make well in center of dough and add salt and rosemary. Knead dough on low speed for 5 minutes. Increase speed to medium and continue to knead until dough is smooth and slightly tacky, about 1 minute. If dough is very sticky, add 1-2 tablespoons flour and continue mixing for 1 minutes. Transfer dough to lightly floured counter and pat into 12×6-inch rectangle.
- Press olives into dough. Starting at long side, roll rectangle into tight log. With seam side facing up, roll log into coil. Transfer dough, spiral side up, to oiled container or bowl, at least 2 quarts in volume, and cover with plastic wrap. Let dough rise in warm, draft-free location until it increases in size by 50 percent, about 1 hour.
- Fold partially risen dough over itself. Turn bowl 90 degrees; fold again. Turn bowl again; fold once more. Cover with plastic wrap and let rise 30 minutes.
- Repeat folding, replace plastic wrap, and let rise until doubled in volume, about 30 more minutes.
- Transfer dough to lightly floured work surface, being careful not to deflate. Divide dough in half, loosely shape each piece into ball, and let rise 15 minutes. Flip each ball over and, starting from top, roll into tight oval shape. Using palms, roll each oval from center outward until 12-inch loaf is formed. Poke any olives that fall off into bottom seam, then pinch seam closed.
- Transfer each loaf, seam side down, to 12×6-inch piece of parchment and cover with plastic wrap. Let rise until doubled in size, 1-1 1/2 hours (dough is ready when it springs back slowly when pressed lightly with finger.).
- Adjust oven rack to lower-middle position; place baking stone on rack, and heat oven to 450°F at least 30 minutes before baking.
- Slide parchment sheets with loaves onto peal or back of inverted baking sheet. Starting and stopping about 1 inch from each side, use razor blade or sharp knife to cut three 1/2-inch deep slashes on diagonal along top of each fully risen loaf. Use a spray bottle filled with water to spray loaves lightly with water. Carefully slide parchment with loaves into oven using jerking motion.
- Bake 15 minutes, spraying loaves with water twice more in the first 5 minutes, and then reduce oven temperature to 375°F Continue to bake until bread is deep golden brown and instant-read thermometer inserted into center of loaf registers 210°F, 25-30 minutes. Transfer to wire rack, discard parchment, and cool loaves to room temperature, about 2 hours.
[custom-related-posts title=”Recommended Recipes Just For You” none_text=”None found” order_by=”date” order=”ASC”]