Delicious Horse Cookies: A Recipe Your Equine Will Love!
Welcome to my kitchen, horse lovers! Today, I will be sharing with you my very own recipe for homemade horse cookies. These treats are perfect for rewarding your four-legged friends after a long day of training, trail riding, or just being a good companion.
As a chef, I believe that the best treats are always the ones that are made from scratch with love and care. Homemade horse treats are no exception. Not only are they more affordable than store-bought treats, but they also give you complete control over the ingredients that you use.
In this recipe, I will be using ingredients that are not only tasty but also healthy for your horse. I understand that our equine friends have specific dietary needs, which is why I have carefully chosen ingredients that are safe and beneficial for them.
So, come on and join me in the kitchen. Let’s whip up some delicious and nutritious horse cookies together!
Why You’ll Love This Recipe
If you’re looking for a tasty and healthy treat for your beloved horse, this horse cookies recipe is perfect for you! Not only are these homemade horse treats easy to make, but they also contain nutritious ingredients that can benefit your horse’s health.
With a combination of oats, shredded carrots, and applesauce, these horse cookies provide a delicious and healthy snack for your equine friend. The molasses and brown sugar add a touch of sweetness that your horse will surely love.
Plus, this recipe is easily customizable to your horse’s preferences. You can add peppermint or peanut butter to the mix to make the treats even more enticing. You can also adjust the consistency of the dough to make the cookies soft or crunchy, depending on your horse’s preference.
By making homemade horse treats, you can ensure that your horse is not consuming any harmful additives or preservatives often found in store-bought treats. Also, it is a great way to bond with your horse by preparing their treats with love and care.
Overall, this horse cookies recipe is a great way to treat your horse while providing them with a healthy and nutritious snack. Plus, it’s a fun and easy DIY project that you and your horse will surely enjoy.
Ingredient List
Let’s dive into the ingredients for these homemade horse cookies. You’ll need a variety of ingredients to make these treats, but don’t worry, they are all easy to find at your local grocery store. Here’s what you’ll need:
Dry Ingredients:
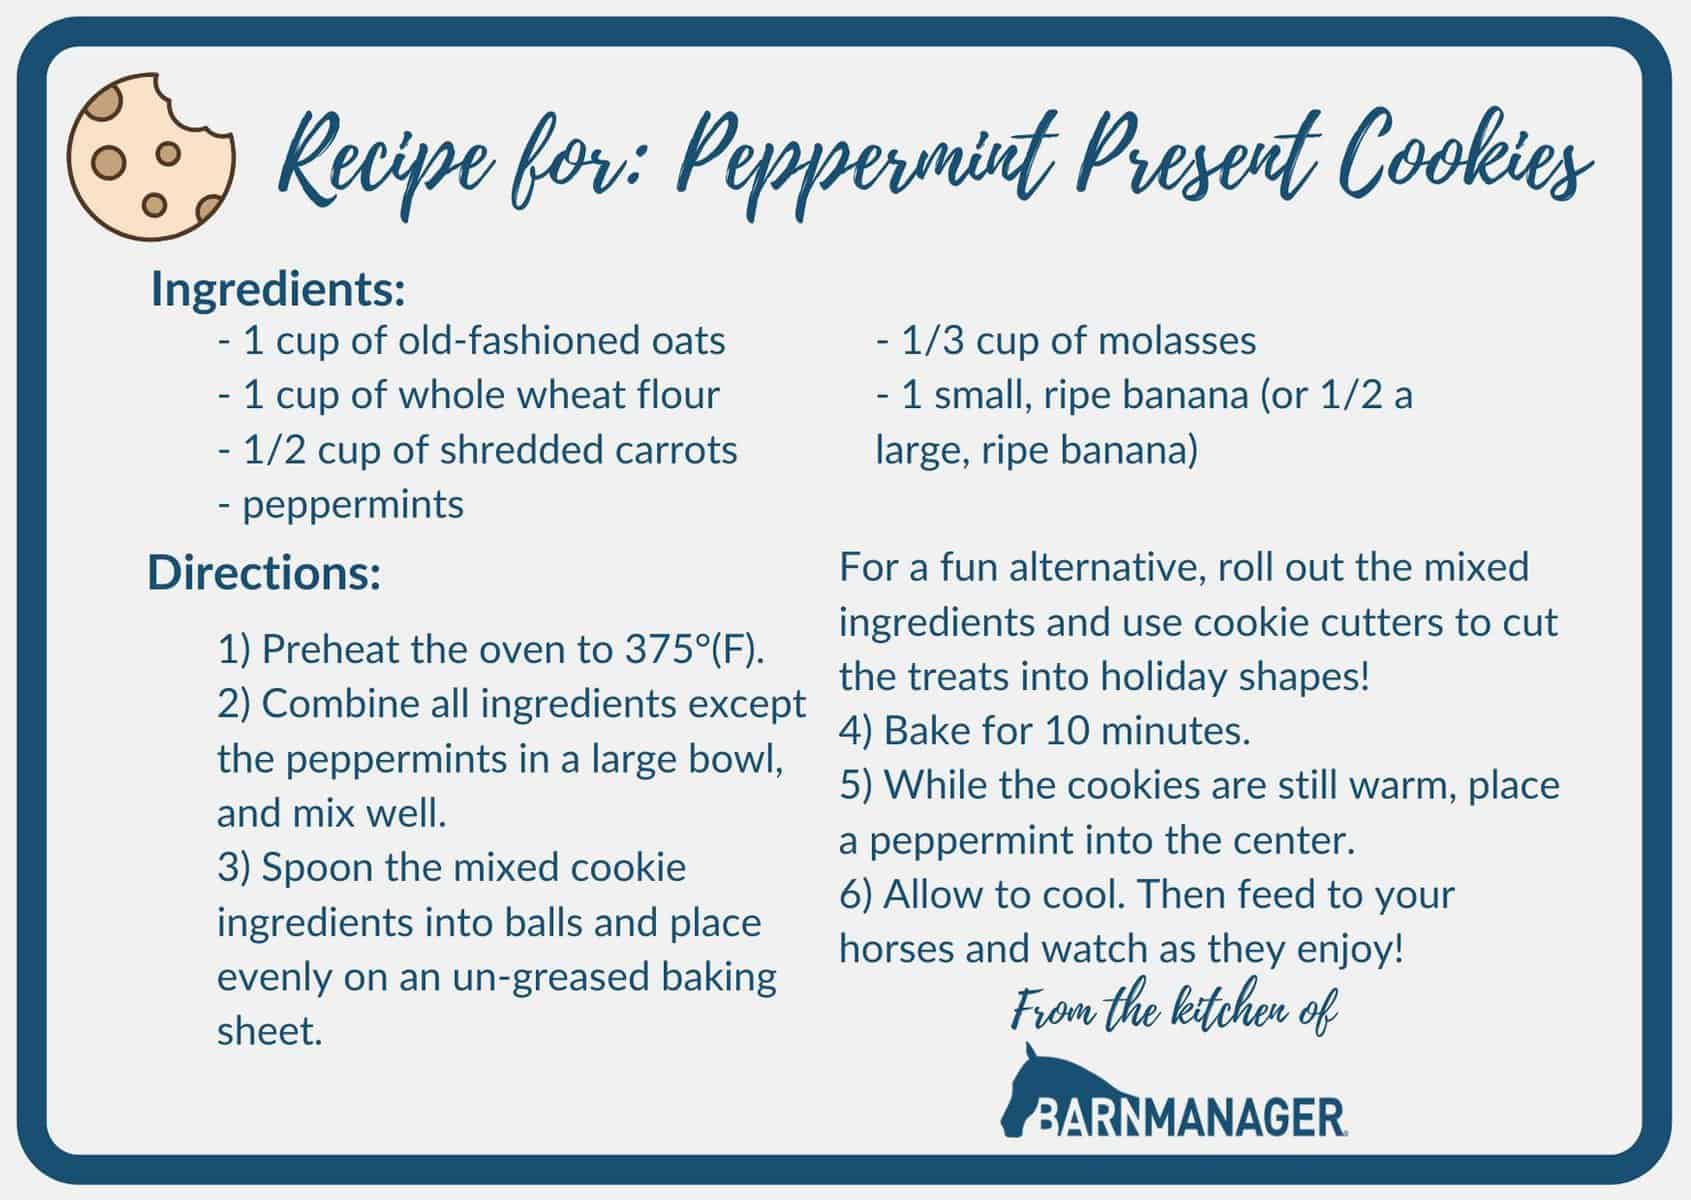
- 2 cups old-fashioned oats
- 1 cup all-purpose flour
- 1/2 cup brown sugar
- 1/2 tsp salt
Wet Ingredients:
- 1/2 cup molasses
- 1/2 cup applesauce
- 1 large egg
Optional Add-Ins:
- 1 grated carrot
- 1 grated apple
To make these cookies even healthier, you can also add in some shredded coconut or chopped nuts.
The Recipe How-To
Now, it’s time to get our hands dirty and make some homemade horse cookies! This recipe is easy to follow and requires no baking at all.
Ingredients:
- 2 cups oatmeal
- 1 cup all-purpose flour
- 1 large apple, grated
- 1 carrot, grated
- 1/2 cup molasses
- 1/2 cup applesauce
- 2 tablespoons vegetable oil (or coconut oil)
- 1 egg
- 2 tsp brown sugar
- 1/2 tsp salt
- 2 tbsp hot water (optional)
Instructions:
-
In a large bowl, mix the oatmeal, flour, grated apple, and grated carrot together.
-
In a separate bowl, mix the molasses, applesauce, vegetable oil, egg, brown sugar, salt, and hot water (if using) until well combined.
-
Pour the wet ingredients into the dry ingredients and stir until the mixture is well combined.
-
Roll the mixture into balls, about the size of a golf ball, and place them onto a lined baking sheet.
-
Use a fork to flatten the balls slightly, creating a cookie shape.
-
Chill the cookies in the fridge for at least 1 hour to allow them to set.
-
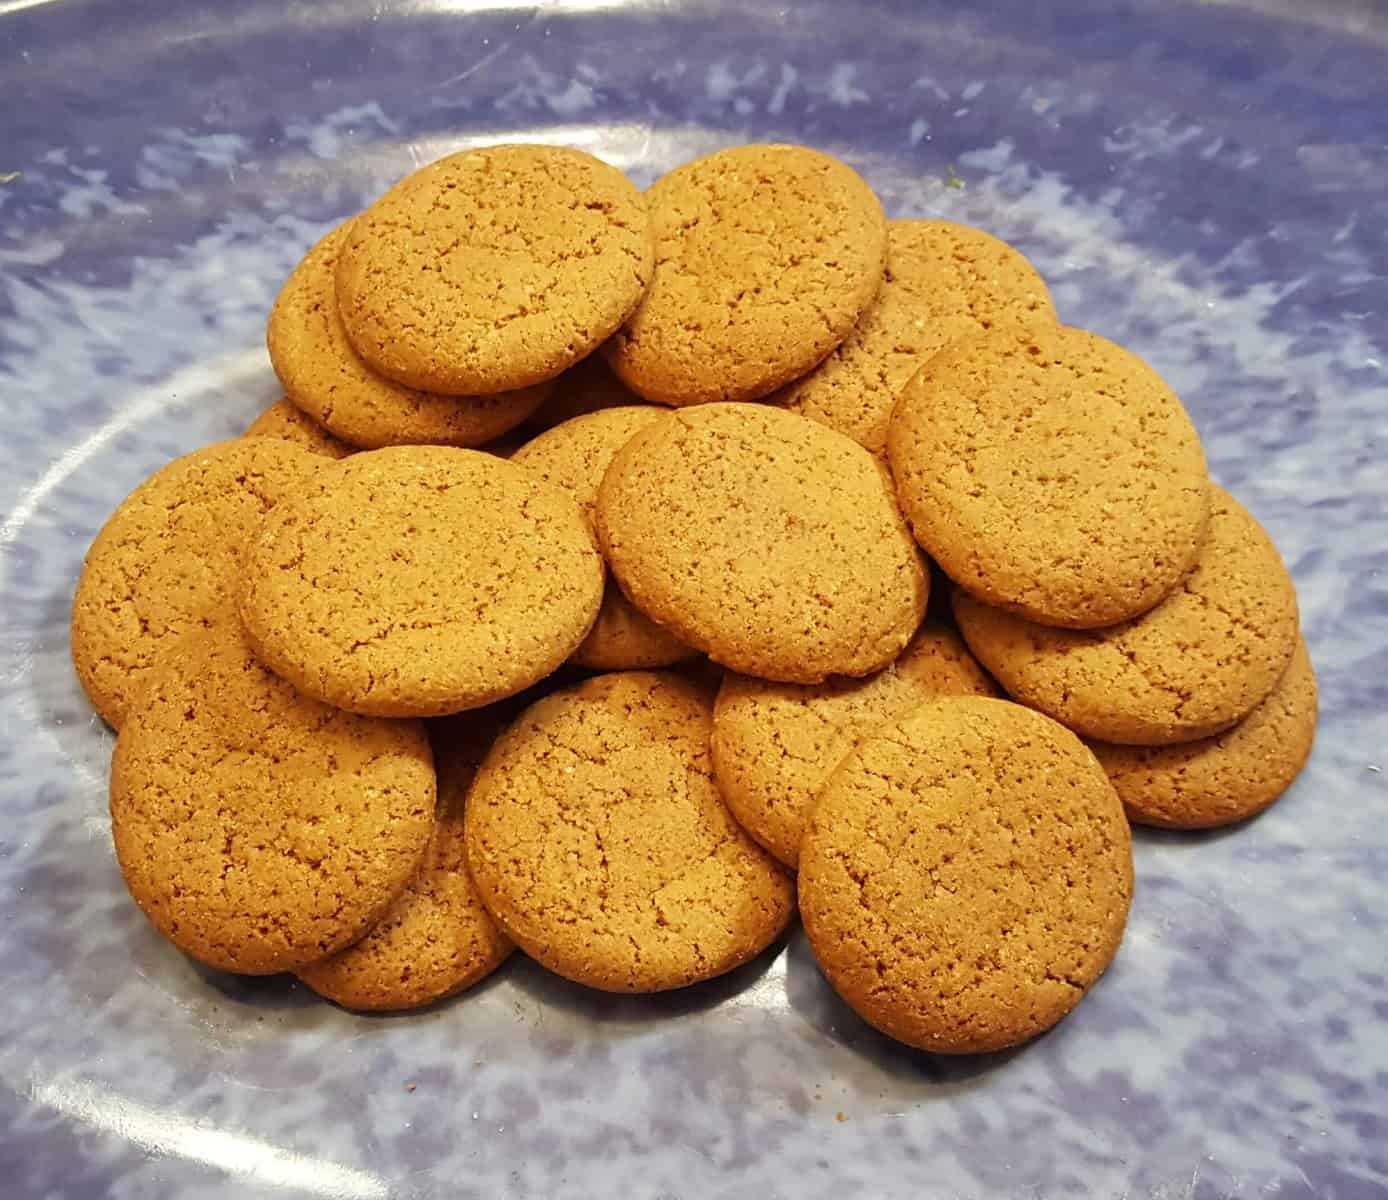
Once the cookies are set, they are ready to serve!
No-Bake Option:
If you want to skip the chilling step, you can also serve these cookies as no-bake treats. Simply roll the mixture into balls and serve as is.
DIY Gourmet Option:
For an extra special treat, you can add some peppermint extract to the mixture for a refreshing flavor. You can also make a sugar-free icing by mixing together some oatmeal, peanut butter, and hot water until you reach your desired consistency. Drizzle the icing over the cookies for a cute and crunchy finish.
April Anti-Inflammatory Horse Treats:
If you want to make these cookies as anti-inflammatory horse treats, simply swap out the all-purpose flour for whole wheat flour and omit the brown sugar. You can also add 1 tablespoon of turmeric and 1 tablespoon of cinnamon to the mixture for an extra anti-inflammatory boost.
Substitutions and Variations
One of the best things about making homemade horse treats is that you can easily customize the recipe to fit your horse’s preferences and dietary needs. Here are some substitutions and variations to try:
– Flour: Instead of all-purpose flour, you can use whole wheat flour or another type of flour such as coconut flour or almond flour. Keep in mind that different types of flour may require different amounts of liquid.
– Sweeteners: If you prefer not to use molasses or honey, you can use brown sugar or another sweetener of your choice. Just be sure to adjust the amount of liquid in the recipe accordingly.
– Fruits and Vegetables: Feel free to experiment with different fruits and vegetables in this recipe. Carrots and apples are popular choices, but you could also try using pumpkin, sweet potato, or banana.
– Oats: You can use either rolled oats or quick oats in this recipe. If you prefer a softer texture, use quick oats. If you prefer a crunchier texture, use rolled oats.
– Oil: Instead of vegetable oil, you can use coconut oil or another type of oil. Just be sure to use an oil that is safe for horses to consume.
– Spices: If you want to add some extra flavor to your horse treats, you can try adding spices such as cinnamon or peppermint.
– Icing: If you want to make your horse treats extra special, you can add an icing on top. You can make a simple icing by mixing powdered sugar with a little bit of water or milk. Just be sure to avoid using any artificial sweeteners or other ingredients that may not be safe for horses.
Remember, when making substitutions or variations, it’s important to keep in mind your horse’s specific dietary needs and restrictions. Consult with your veterinarian if you have any questions or concerns about what ingredients are safe for your horse to consume.
Serving and Pairing
Once your homemade horse cookies have cooled, it’s time to serve and enjoy them with your equine companion. These treats are perfect for rewarding your horse after a ride or as a special snack during grooming time.
When it comes to pairing, there are many options to consider. You can serve them as is or try adding a touch of gourmet to your homemade horse treats by adding icing or peppermint. For a sugar-free option, try substituting brown sugar with honey or molasses honey.
If you want to create a complete snack plate for your horse, you can serve the cookies with sliced apples or shredded carrots. This adds a healthy and refreshing aspect to the snack, making it a well-rounded treat for your horse.
One of my personal favorite pairings is to serve these horse cookies with a side of hot water or apple sauce. The hot water softens the cookies and creates a warm and comforting snack. On the other hand, the apple sauce adds a sweet and tangy flavor that complements the horse cookies perfectly.
No matter how you choose to serve or pair your homemade horse cookies, one thing is certain: your horse will love them! These treats are easy to make, healthy, and delicious, making them the perfect snack for your equine companion.
Make-Ahead, Storing and Reheating
These homemade horse cookies are a great treat for your equine friends, but you don’t have to make them fresh every time. You can easily make them ahead of time and store them for later use. Here are some tips on how to make-ahead, store, and reheat your horse cookies.
To make-ahead, simply prepare the cookie dough as instructed in the recipe. Once you have shaped the cookies, you can store them in an airtight container in the refrigerator for up to a week. You can also freeze them for up to three months. When you’re ready to bake, simply let them thaw in the refrigerator overnight and bake as instructed.
When storing the baked cookies, make sure they are completely cooled down before storing them in an airtight container. You can store them at room temperature for up to a week, or in the refrigerator for up to two weeks. If you want to keep them for longer, you can freeze them for up to three months. To thaw, simply let them sit at room temperature for a few hours.
Reheating the cookies is not necessary, but if you want to serve them warm, you can reheat them in the microwave or oven. To reheat in the microwave, simply place the cookie in the microwave for 10-15 seconds. To reheat in the oven, place the cookies on a baking sheet and bake at 350°F for 5-10 minutes. Be careful not to overheat them, as they can become too hard and lose their texture.
By following these storing and reheating tips, you can enjoy these homemade horse cookies any time you want, without the hassle of making them fresh every time. Your equine friends will surely love them, whether they’re fresh out of the oven or reheated.
Tips for Perfect Results

When making horse cookies, there are a few tips that can help you achieve perfect results. Here are some of my recommendations for making the best homemade horse treats:
1. Use hot water to help dissolve the molasses and brown sugar. This will make it easier to mix the wet ingredients with the dry ones.
2. Don’t overmix the ingredients. When adding the dry ingredients, mix them just enough to combine everything without overworking the dough. Overmixing can cause the cookies to become tough or dry.
3. Use a cookie scoop or spoon to create uniform sized cookies. This will help ensure that they all bake evenly.
4. Grease your baking sheet or line it with parchment paper. This will prevent the cookies from sticking to the sheet and make clean up easier.
5. Keep an eye on the cookies while they’re baking. While the recipe calls for 15-20 minutes, every oven is different. Check them after 15 minutes and keep a close eye on them until they’re done.
6. Let the cookies cool completely before storing them. This will help them retain their shape and prevent them from becoming too soft or crumbly.
7. Store the cookies in an airtight container at room temperature. They’ll stay fresh for up to a week.
8. Experiment with different flavors and ingredients. You can try adding shredded carrots, applesauce or even peppermint oil to your cookies to create unique flavor combinations that your horse will love.
With these tips, you’ll be able to make the perfect batch of horse cookies every time. Get creative and have fun with your homemade horse treats!
FAQ
Before you get started on making these delicious homemade horse treats, you may have some questions about the recipe. In this section, I will answer some common FAQs that you may have. So, let’s get started!
What are horse cookies made of?
For this recipe, we will need a carrot, an apple, molasses or honey, oats, flour, vegetable oil or coconut oil, and water (optional). To prepare the ingredients, we can use either 1/2 to 3/4 cup of flour or blend some oats to make oat flour. This will be the base of our delicious and nutritious dish.
Is flour OK for horses?
When it comes to feeding bread to horses, as long as the bread is made from wheat flour, yeast, salt, and water, it won’t cause any harm to the horse. In fact, bread can be a great source of calories for horses if served in large portions.
What are horse treats made of?
If you’re an equestrian or simply a horse lover, you know how important it is to treat your equine friends every once in a while. One of the best ways to do so is by making some homemade horse treats. In this recipe, we’ll be using either sugar or dry molasses (although the latter is preferred), light karo syrup, water, and a pinch of salt to create some sweet and savory delights for our four-legged pals. So let’s get started!
What can I use as horse treats?
If you want to treat your equine friend to some snacks, there are plenty of options beyond the classic apples and carrots. Some safe and tasty choices include raisins, grapes, bananas, strawberries, cantaloupe or other melons, celery, pumpkin, and snow peas. It’s important to note that while most horses will chew these treats before swallowing, there is a risk of choking for those who tend to gulp large pieces. So, it’s best to cut up the snacks into smaller pieces to avoid any potential hazards.
Bottom Line
In conclusion, this horse cookies recipe is not only easy to make but also healthy and delicious. With the right ingredients and a simple process, you can create homemade horse treats that your equine friend will love. Whether you’re looking for a quick snack, a way to reward your horse, or a thoughtful gift for a fellow equestrian, this recipe is sure to impress.
The best part about this recipe is that it’s completely customizable. You can substitute ingredients or add your own twist to make it your own. Plus, with the option to make it ahead and store it for later, you can always have horse treats on hand. And if you’re feeling adventurous, you can try out some of the variations, such as the peppermint or gourmet icing.
So, what are you waiting for? Give this horse cookies recipe a try and see for yourself why it’s a must-have in every equestrian’s kitchen. Your horse will thank you for it, and you’ll feel good knowing that you’re providing them with a healthy and tasty treat. With this recipe, you’ll never have to buy store-bought horse treats again. Happy baking!
Horse Cookies Recipe

This is a cheap alternative to buying horse cookies and my horse loves them! Not for human consumption.
- 4 cups all-purpose flour
- 3 cups oatmeal
- 4 tablespoons brown sugar
- 1 egg
- 3/4 cup applesauce
- 4 tablespoons vegetable oil
- 1/2 cup molasses
- 1 cup hot water
- Preheat oven to 300°F and grease cookie sheet.
- Mix flour, oatmeal, and molasses. Add to dry to ingredients. Mix in hot water and mix thoroughly.
- Roll out dough to 1/2 inch thickness on a floured surface. Cut into shapes using cookie cutters and place on cookie sheet and bake 1 hour.
- Turn oven off and leave the oven door shut until they cool (this makes them crunchy).
[custom-related-posts title=”Recommended Recipes Just For You” none_text=”None found” order_by=”date” order=”ASC”]